Manual de SYLARD
Tabla de contenido
- Introducción
- Etapa 1 |Inicio
- Etapa 2 |Entrando a SYLARD
- Etapa 3 |Registro
- Etapa 4 |Opciones de inicio de sesión y restablecimiento de contraseña
- Etapa 5 |Creando una colección
- Etapa 6 |Cargando audioanotación a una colección
- Etapa 7 |Configurando la presentación visual para los usarios
- Resumen
Introducción
SYLARDes un programa que permite la reproducción línea por línea de audio digital acompañado por anotaciones (p. ej., transcripciones, traducciones y análisis lingüísticos) delimitados por códigos de tiempo en el programa ELAN (EUDICO Linguistic Annotator;https://archive.mpi.nl/tla/elan) SYLARD convierte el código XML de ELAN a HTML y vincula este archivo HTML a una versión .mp3 del archivo de audio. El archivo .wav (no comprimido) es el formato usado para los archivos permanentes mientras que el .mp3 se usa para la reproducción en línea a través de un navegador. Cabe señalar que el uso de SYLARD requiere que el usuario se registre, con el fin de asegurar que aquellas personas que hagan uso de SYLARD están de acuerdo en los términos y condiciones de uso ético establecido por una licencia de Creative Commons (https://creativecommons.org/).
SYLARD permite dos tipos de registro:
- Visitantes:Pueden acceder libremente y reproducir todos los materiales (audio .mp3 y anotaciones, incluyendo transcripciones y traducciones). El registro como Visitante es rápido y automático, se requiere simplemente para asegurar que los Visitantes estén de acuerdo con los Términos y condiciones de SYLARD
- Contribuyentes:Pueden crear una colección que ellos mismos controlen y administren. Primero deben haber subido a un servidor seguro (https) un audio .mp3 y registrar en el módulo de SYLARD el URL. Los Contribuyentes deben subir los metadatos y luego el archivo ELAN que SYLARD convierte a HTML mientras que vincula las anotaciones al archivo .mp3 para su reproducción línea por línea.
Los Visitantes pueden registrarse simplemente seleccionando la opción Visitante en lugar de Contribuyente en el extremo superior izquierdo del formato de registro (verfig. 4).
Etapa 1:Inicio
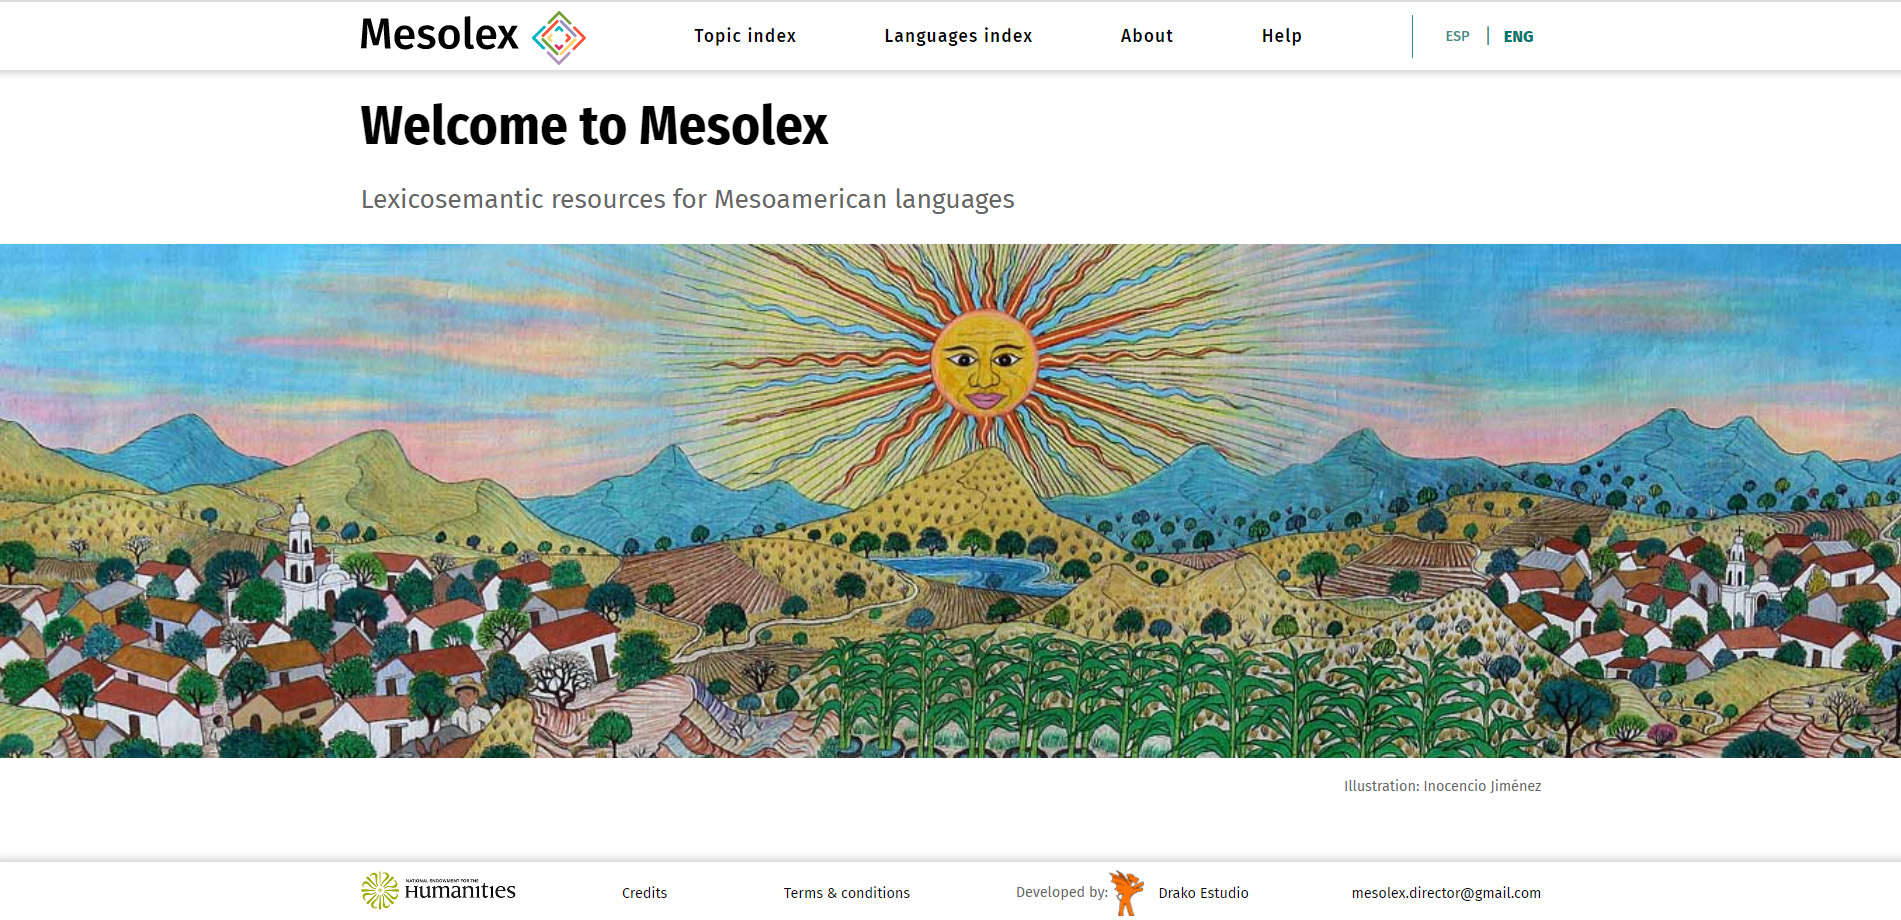
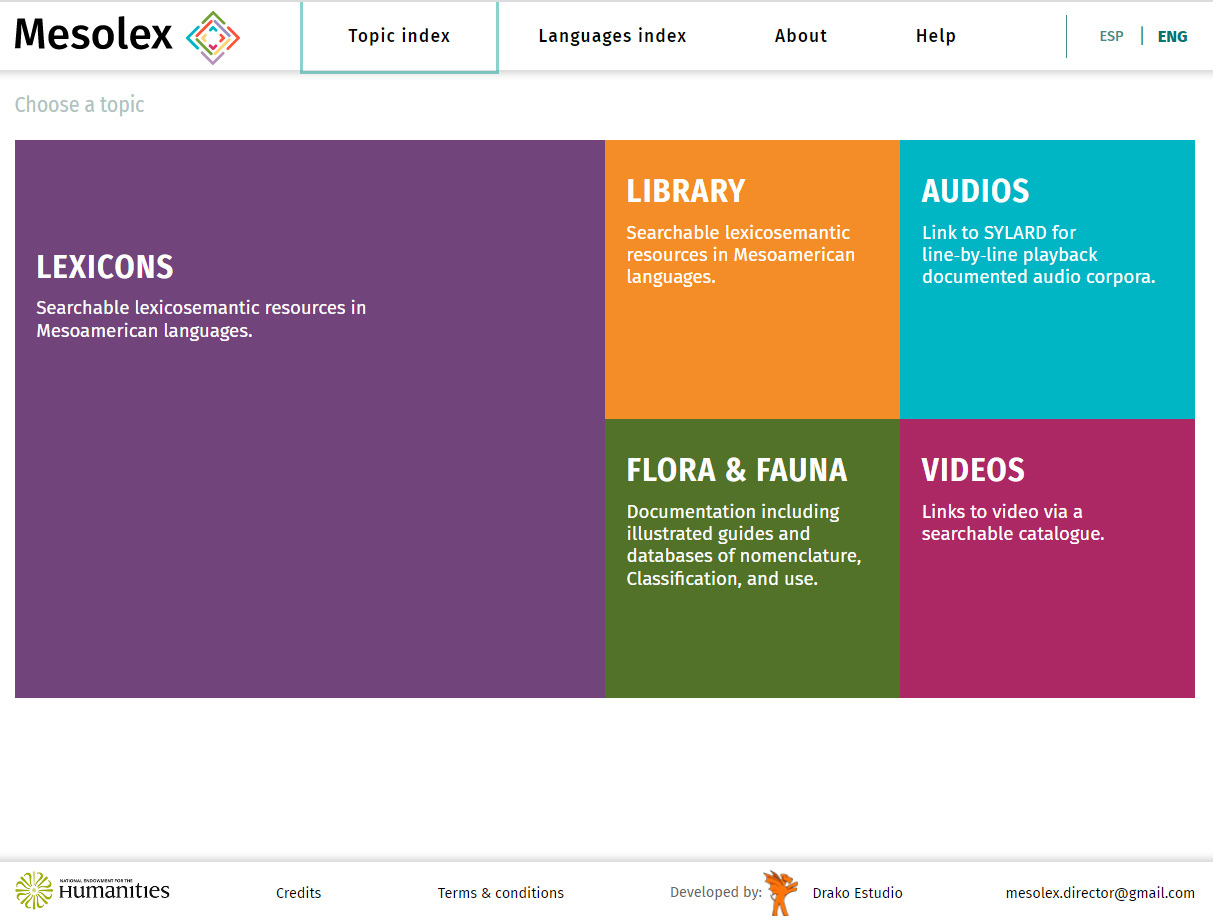
Vaya a la página de inicio de Mesolex (Fig. 1; actualmente enhttps://mesolex-drako-iano9.ondigitalocean.app/en) y haga clic en Índice Temático para acceder a los datos de Mesolex por cinco rutas diferentes (Fig. 2: Léxicos, Biblioteca, Flora y Fauna, Audios y Videos). Para entrar en SYLARD se selecciona la opción del rectángulo llamado Audios.
Etapa 2:Entrando a SYLARD
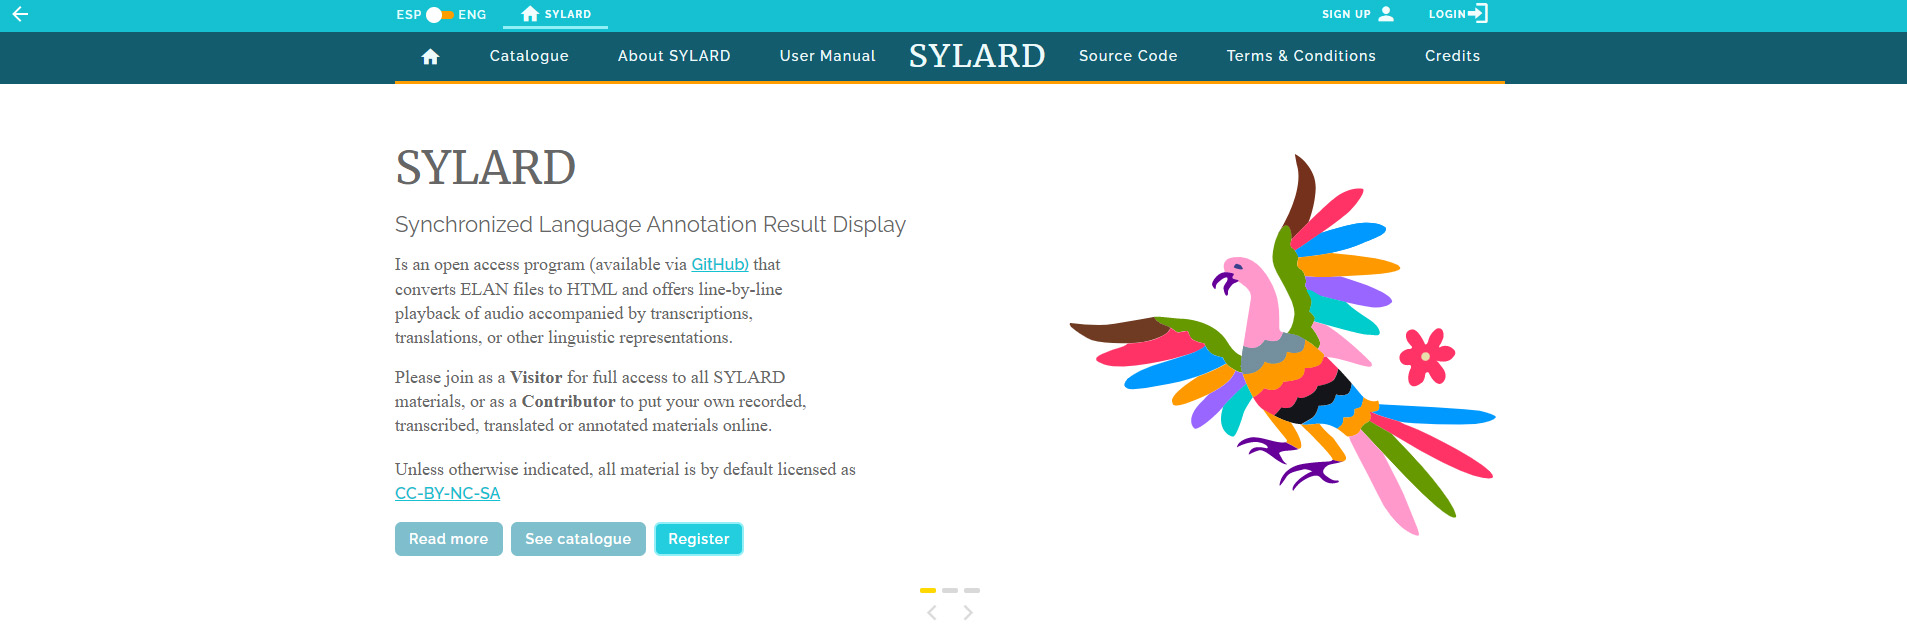
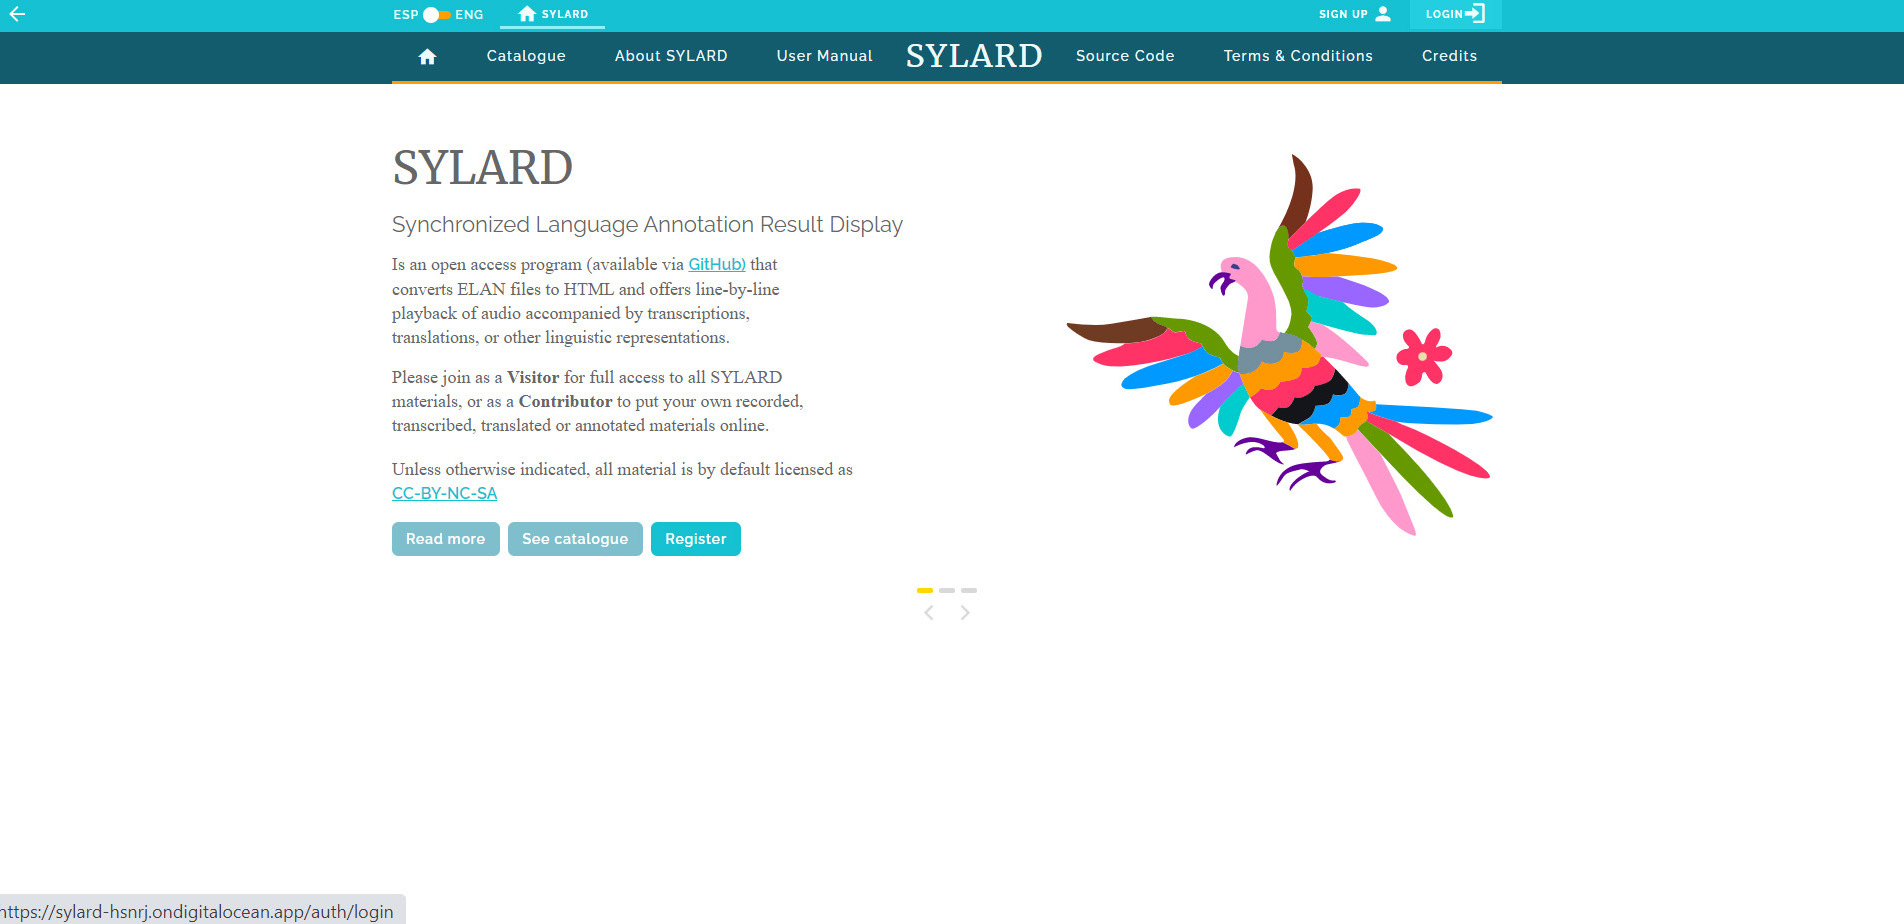
Después de seleccionar Audios en el Índice Temático de Mesolex (fig. 2) el usuario es llevado a la página principal de SYLARD (fig. 3). En esta página hay una cinta de encabezado en azul verdoso oscuro que lleva a los usuarios a las diferentes funciones y documentos: Catálogo, Acerca de SYLARD, Manual de usuario (este documento), Código fuente (en GitHub), Términos y condiciones y Créditos. Para los que ya se han registrado (ya sea como Visitante o como Contribuyente) hay una opción para el acceso (log-in; arriba a la derecha). Los nuevos usuarios de SYLARD tienen la opción de Registrarse (arriba a la derecha) o la opción de Registro (esta última, es una de las tres opciones seleccionables en la mitad de la página). Al hacer clic en Registrarse o Registro, el nuevo usuario llega a la página para Registrarse (ver figs.4,5y6).
Etapa 3:Registro
El registro se realiza a través del Panel de registro. El rectángulo con fondo azul a mano izquierda contiene un link a los Términos y condiciones que tanto los Visitantes como los Contribuyentes tienen que aceptar para completar su registro.
En la parte superior izquierda de la sección a mano derecha (en fondo blanco) se les pide a los usuarios que elijan el estatus en que desean registrarse (Visitante o Contribuyente). Los primeros pasos son básicamente los mismos para ambos, pero el estatus de Contribuyente difiere en que éste deberá ser autorizado por el administrador de SYLARD (figs.10,11y12). Éste le permite al usuario crear colecciones y llenarlas con audio anotado accesible a través de cualquier navegador. Ya que el estatus de Visitante se limita simplemente a escuchar y ver los audios y sus anotaciones, la autorización administrativa no es necesaria.
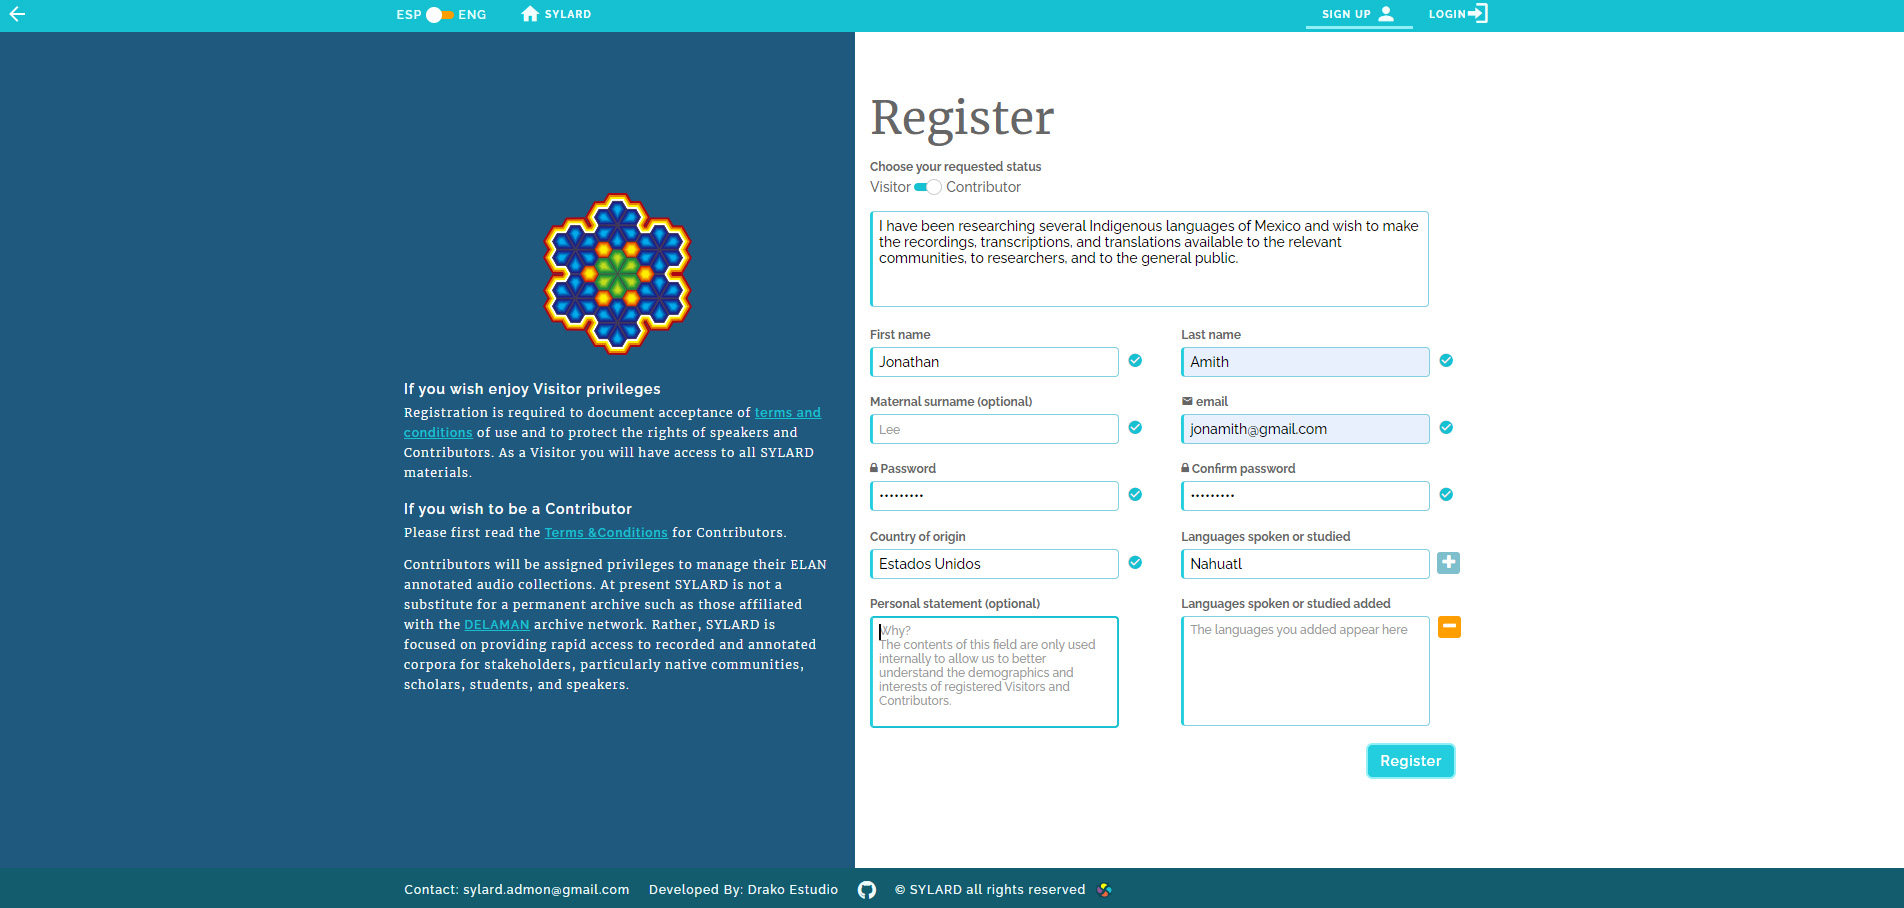
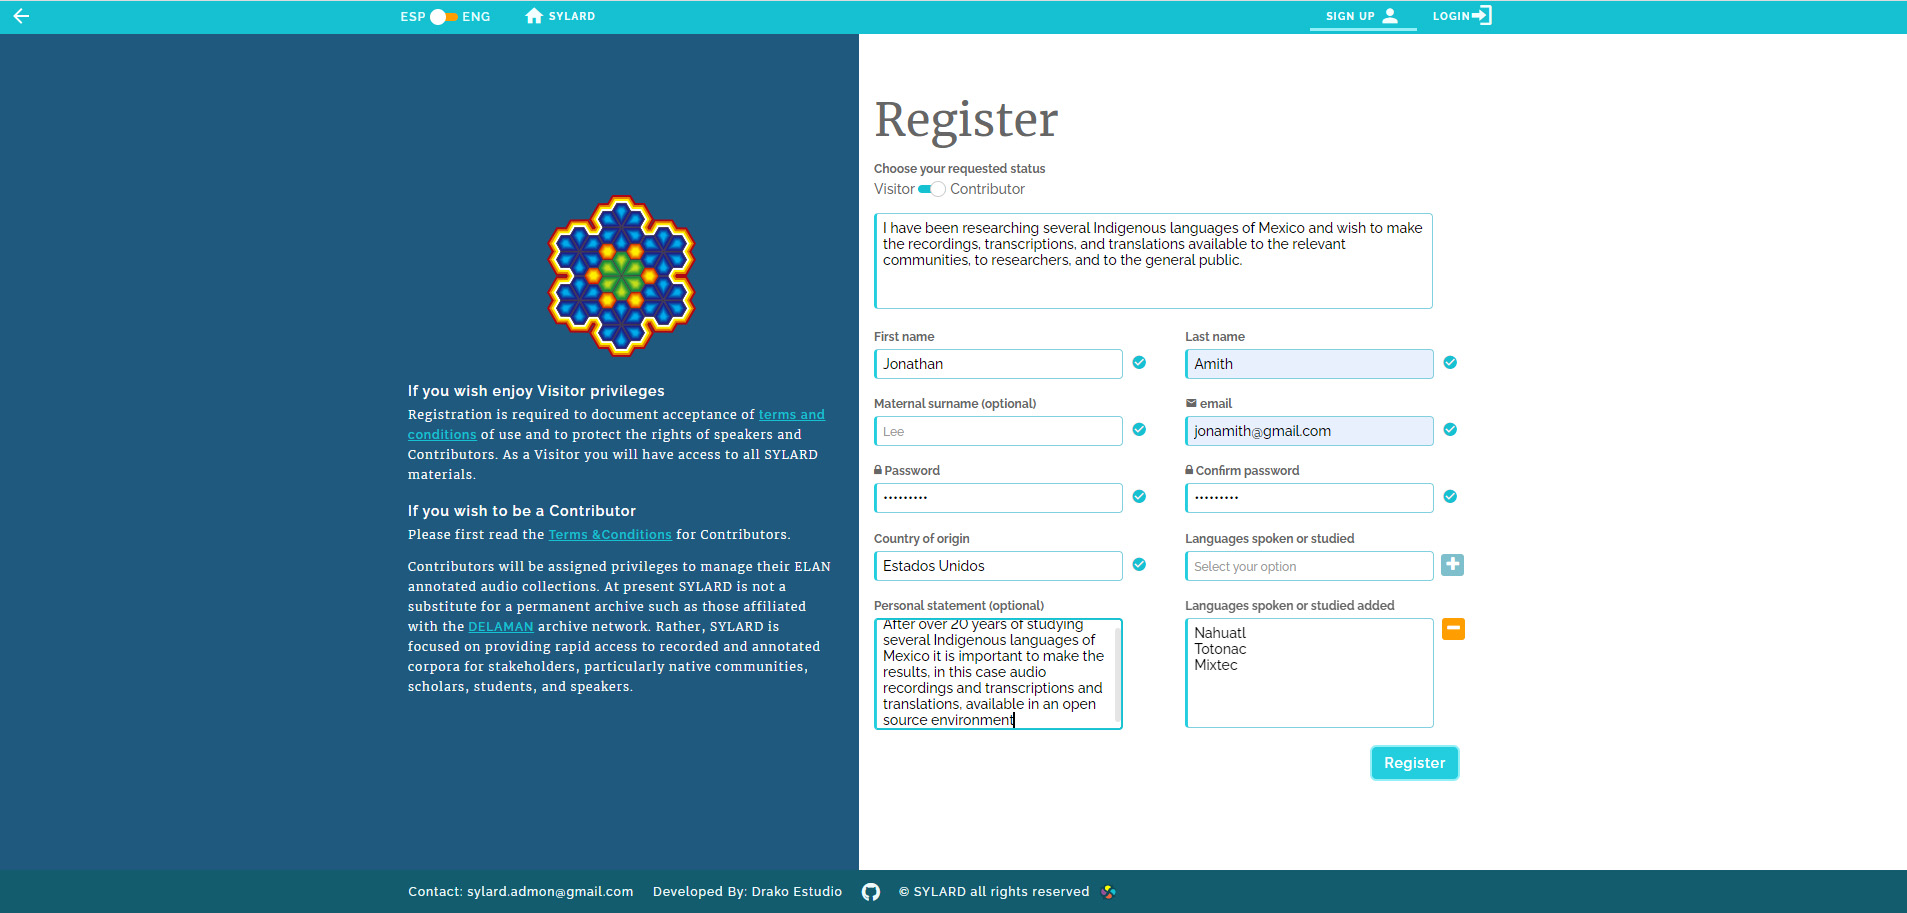
El primer panel que un Contribuyente encuentra al registrarse es una solicitud para responder a la pregunta“Díganos, ¿por qué desea una cuenta de Contribuyente?”.A los Visitantes no se les hace esta pregunta. La respuesta por parte del Contribuyente permitirá al equipo de SYLARD tener un mejor conocimiento de las necesidades de los Contribuyentes. El resto del formato de entrada es sencillo:
- nombre
- correo electrónico
- contraseña y confirmación de la contraseña
- país de origen
- lenguas habladas o estudiadas (recuerde hacer clic en el signo más (+) para que el idioma se agregue al siguiente cuadro: Lenguas habladas o estudiadas agregadas
- Declaración personal (opcional; como se mencionó, esta pregunta es para permitir que el equipo de SYLARD comprenda mejor los intereses de los Contribuyentes)
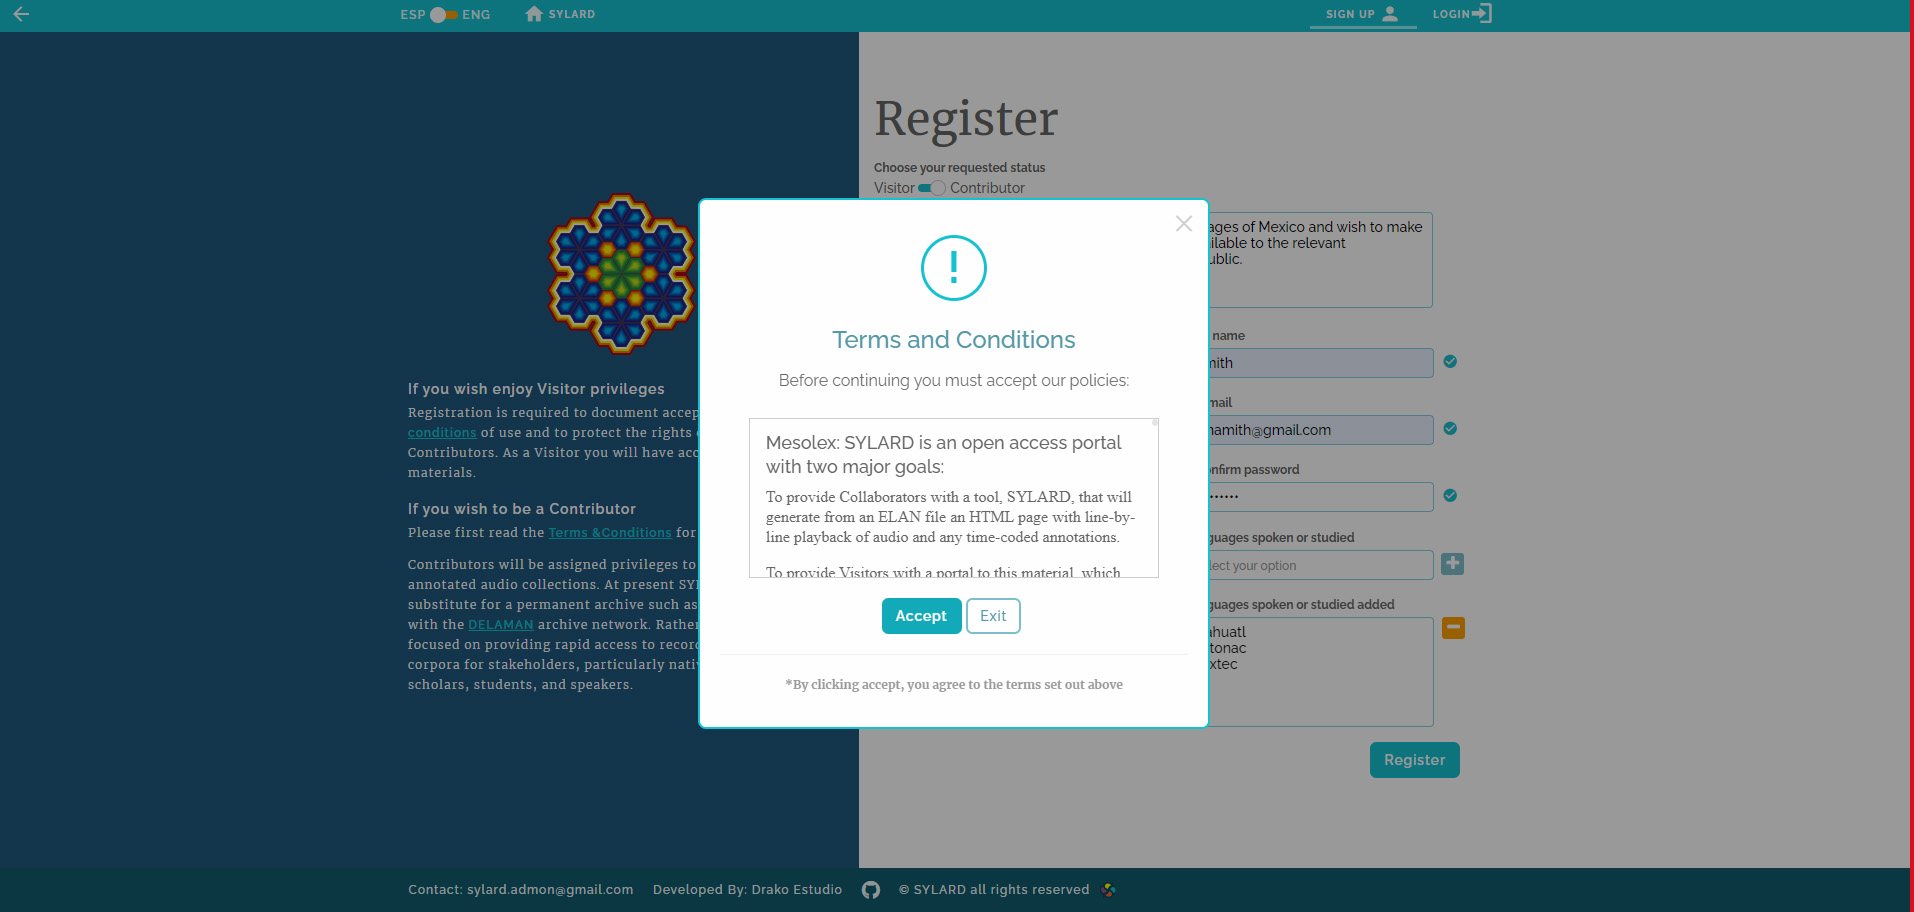
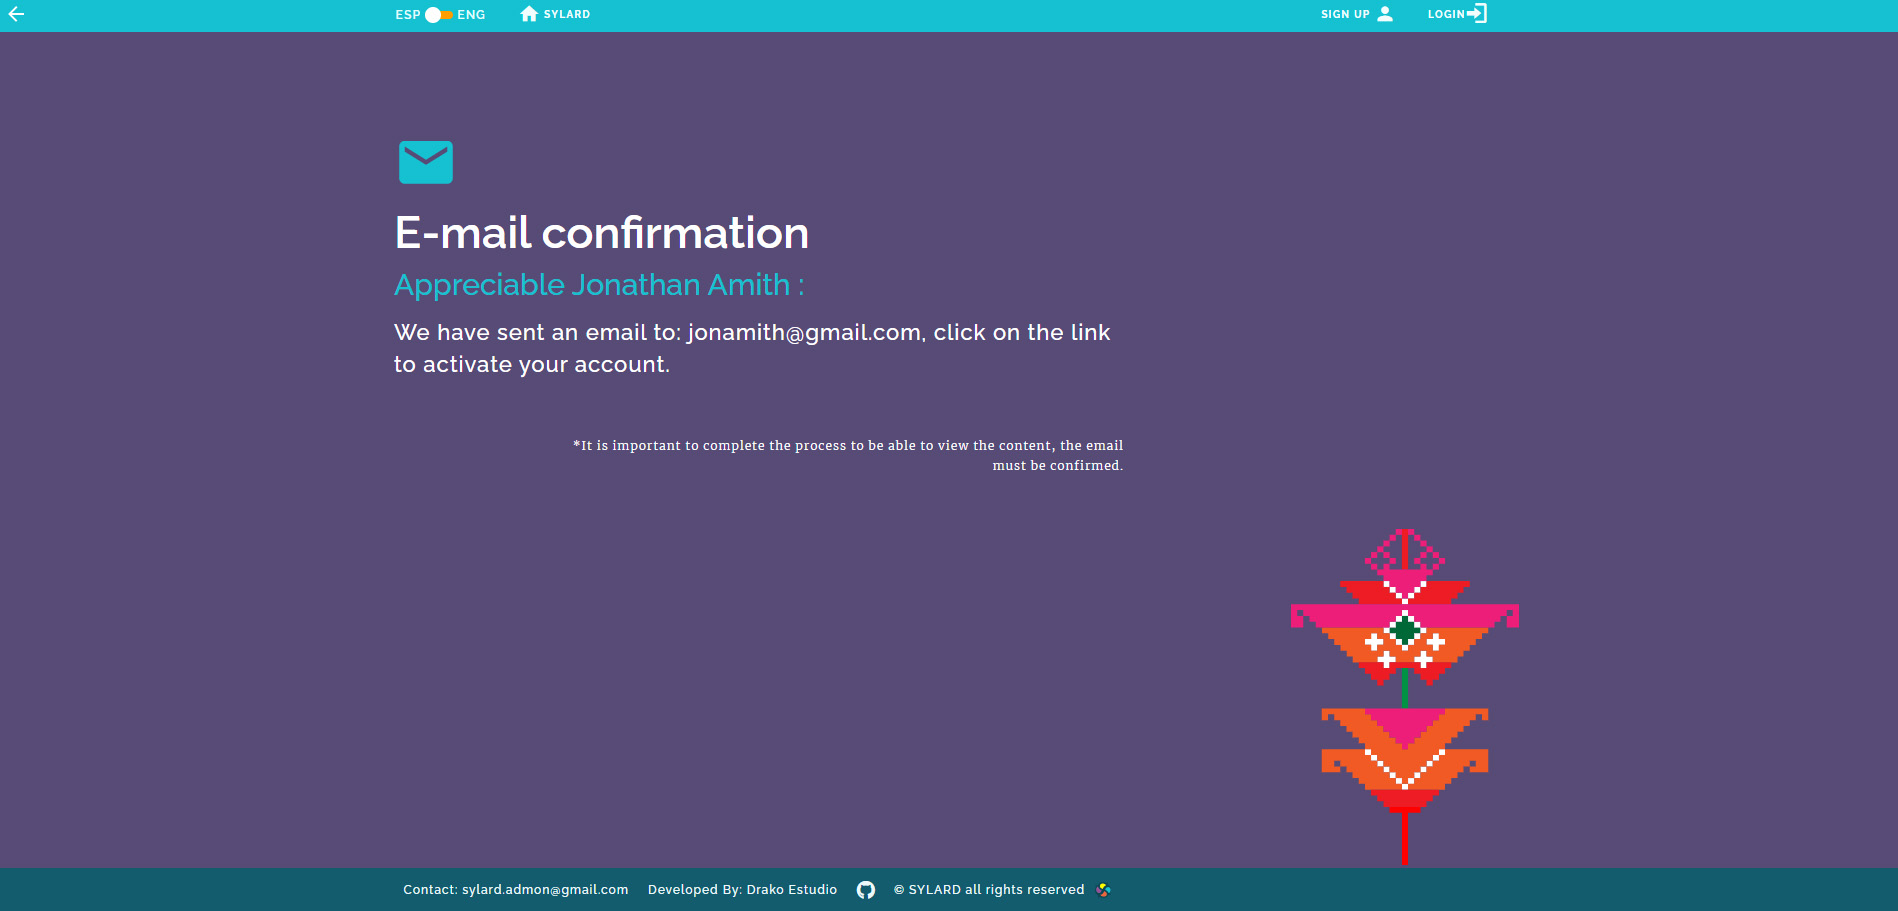
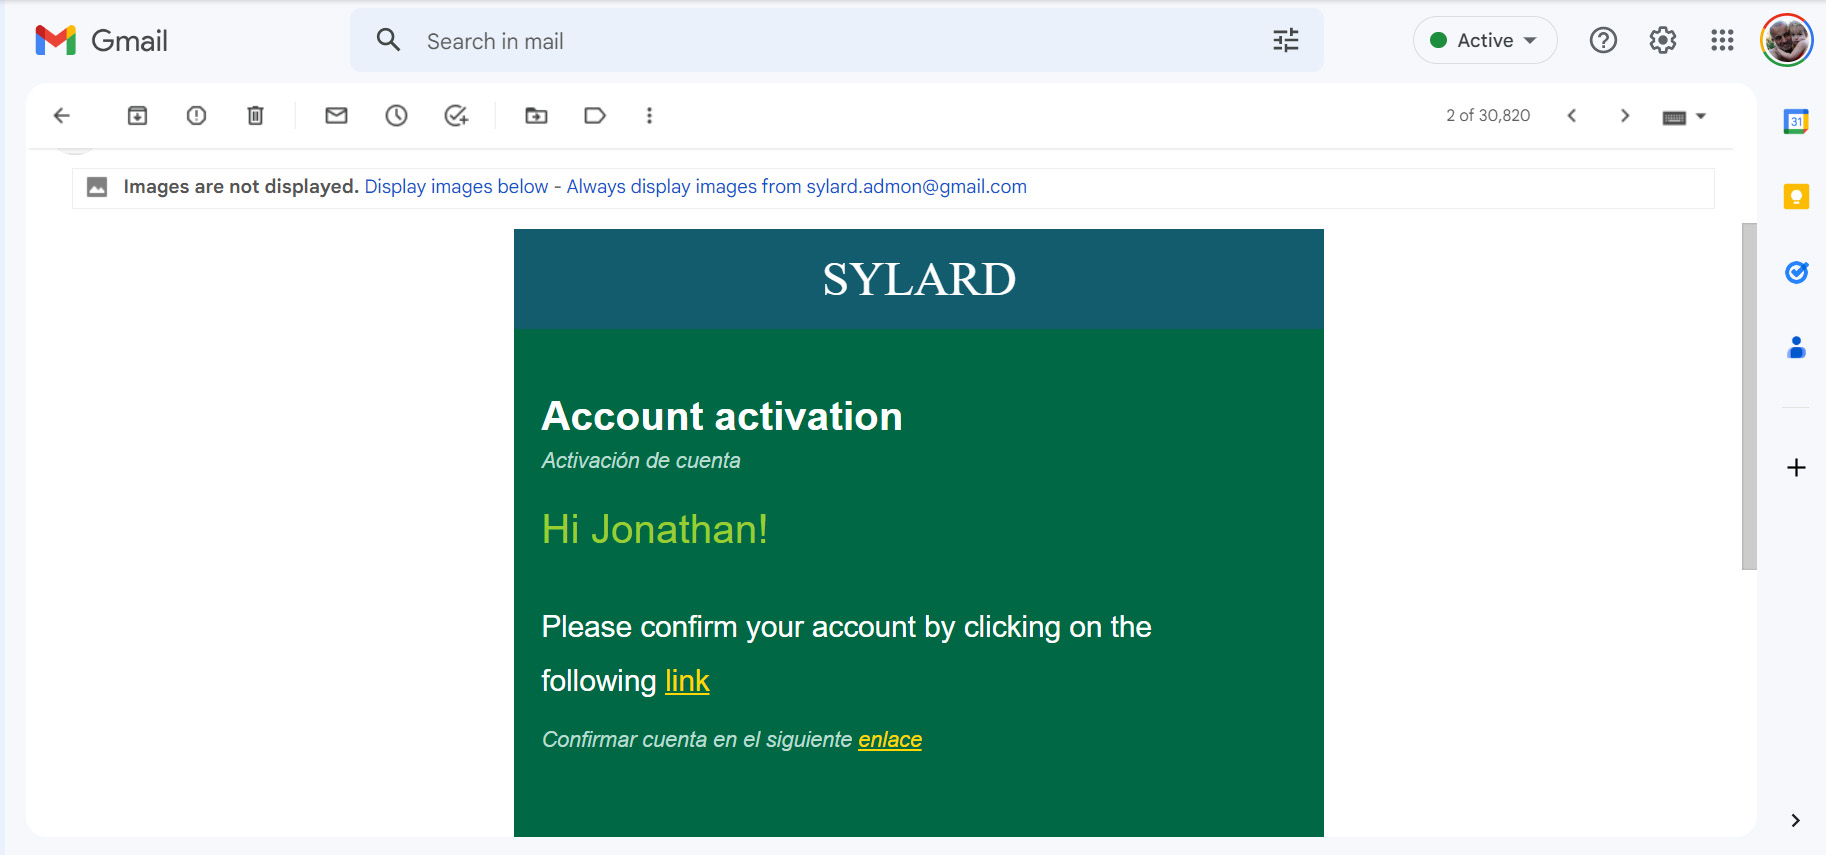
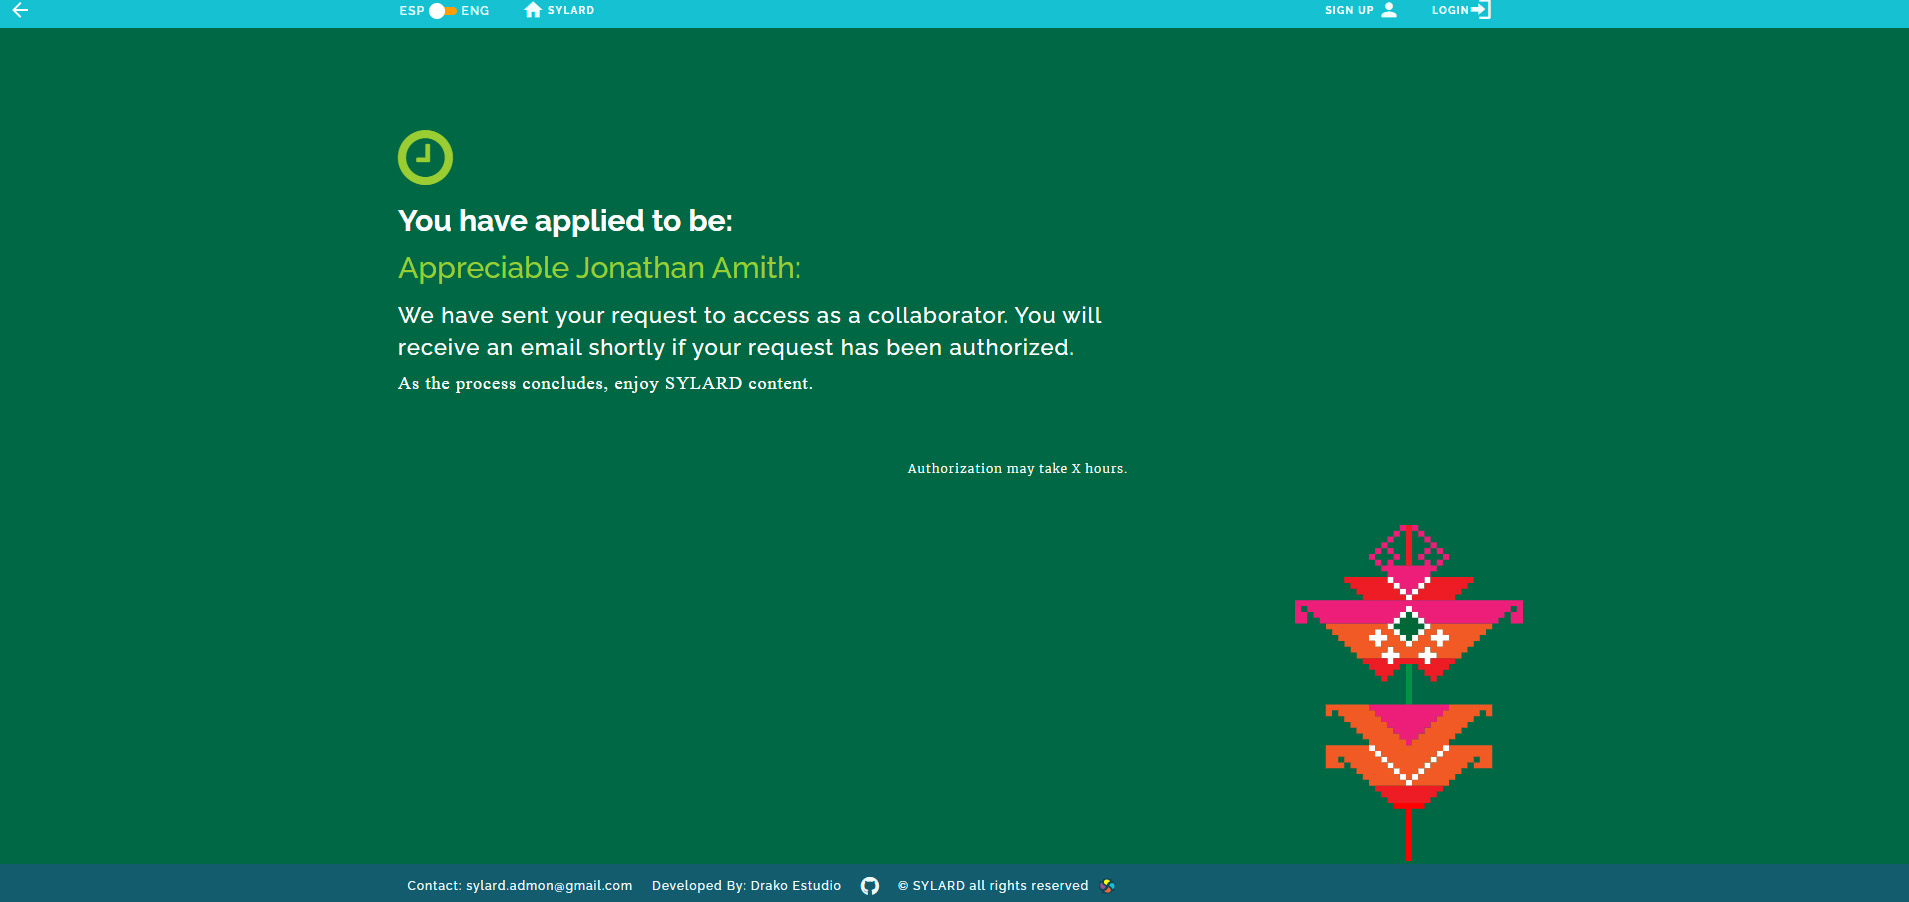
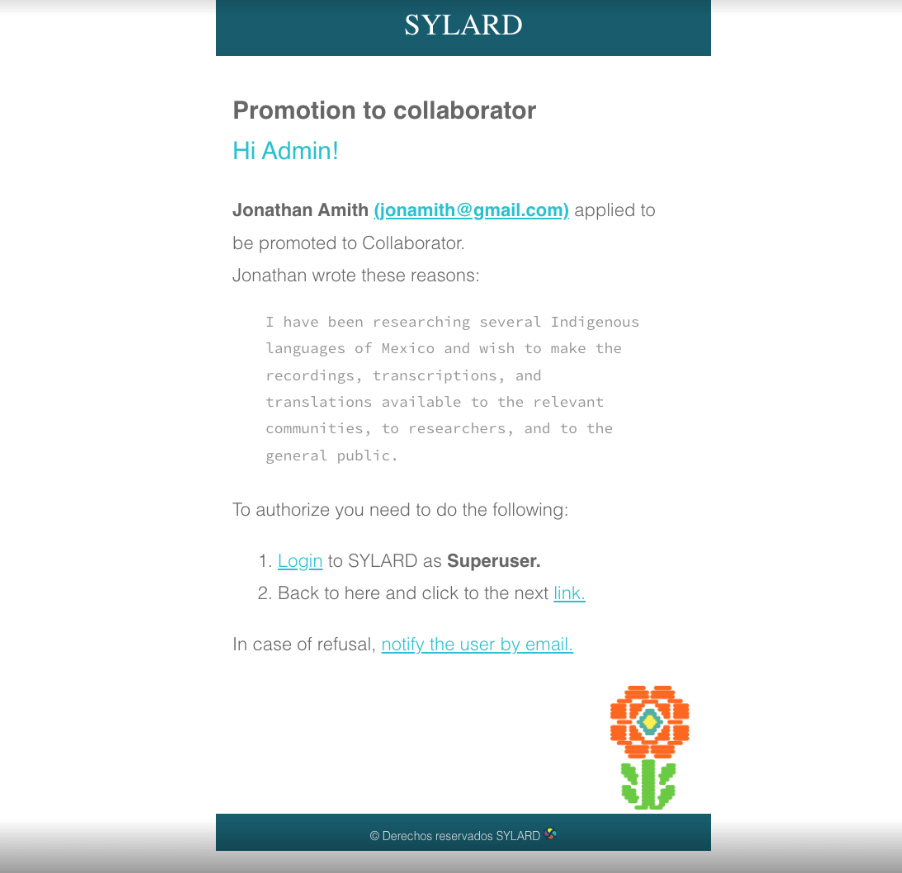
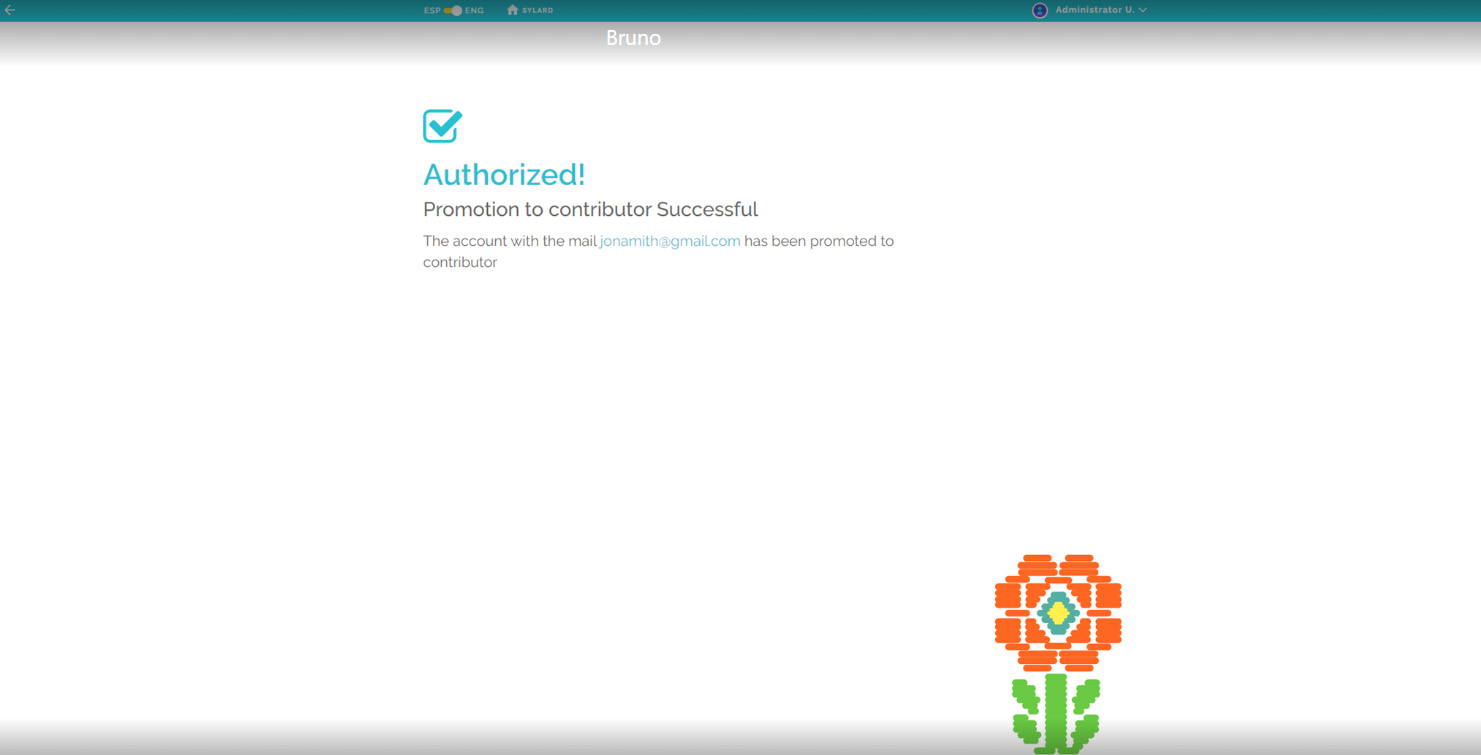
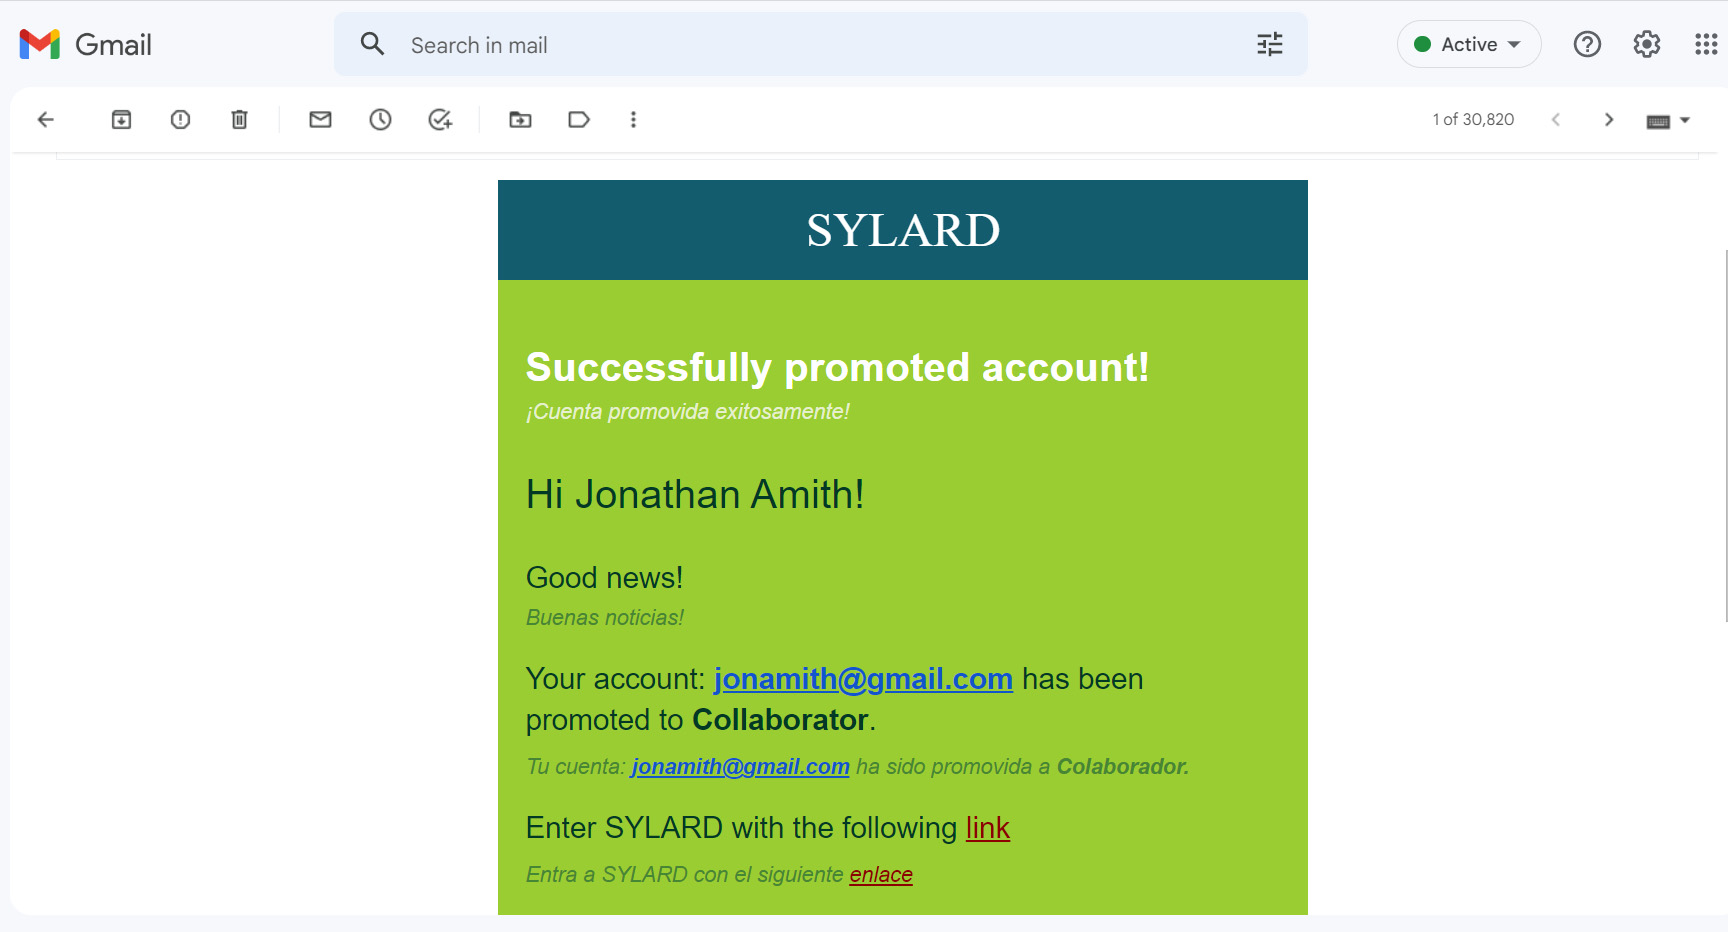
LaFigura 5muestra el formulario de registro completado donde se agregaron tres lenguas habladas o estudiadas, dando clic en el símbolo + junto al rectángulo Lenguas habladas o estudiadas. Una vez completado el formulario, el Contribuyente potencial deberá hacer clic en el botón de Registrar, tras lo cual aparece una ventana con los Términos y condiciones que deberán ser aceptados haciendo clic en Aceptar. En este momento se le notifica al Contribuyente que se le ha enviado un correo electrónico (fig. 7) El Contribuyente deberá ir al correo electrónico asociado con su cuenta de SYLARD y confirmar la solicitud haciendo clic en el enlace que se indica en el mensaje de correo (fig. 8). Esto genera a su vez otra notificación (fig. 9) que informa al posible Contribuyente acerca de que su solicitud ha sido enviada al administrador de SYLARD (fig. 10), quien deberá entonces autorizar la solicitud del estatus de Contribuyente. Una vez que el administrador haya autorizado el estatus de Contribuyente, el administrador verá la confirmación de esta autorización (fig. 11) y el Contribuyente recibirá un correo electrónico confirmando esta autorización (fig. 12).
Por favor, avance a lafigura 13y al texto inmediatamente anterior para continuar la lectura de este manual.
Etapa 4:Opciones de inicio de sesión y restablecimiento de contraseña
Una vez que un usuario ha sido autorizado como Contribuyente puede iniciar una sesión con este nuevo estatus. Para ello, debe ir a la pantalla de inicio de SYLARD (fig. 13) e iniciar una sesión a través del enlace en la esquina superior derecha de la banda del encabezado azul claro. Al hacer clic en el enlace, el Contribuyente es llevado a la página de inicio de sesión (fig. 14) donde se le requiere su correo electrónico y su contraseña registrados. A menudo ocurre que a un usuario (Visitante o Contribuyente) se le ha olvidado su contraseña. En tales casos SYLARD tiene un sistema integrado para obtener una contraseña temporal y luego restablecer una contraseña permanente. Para esto primero se debe hacer clic en ¿Se le olvidó su contraseña? como se muestra en lafigura 14, en la esquina inferior izquierda.

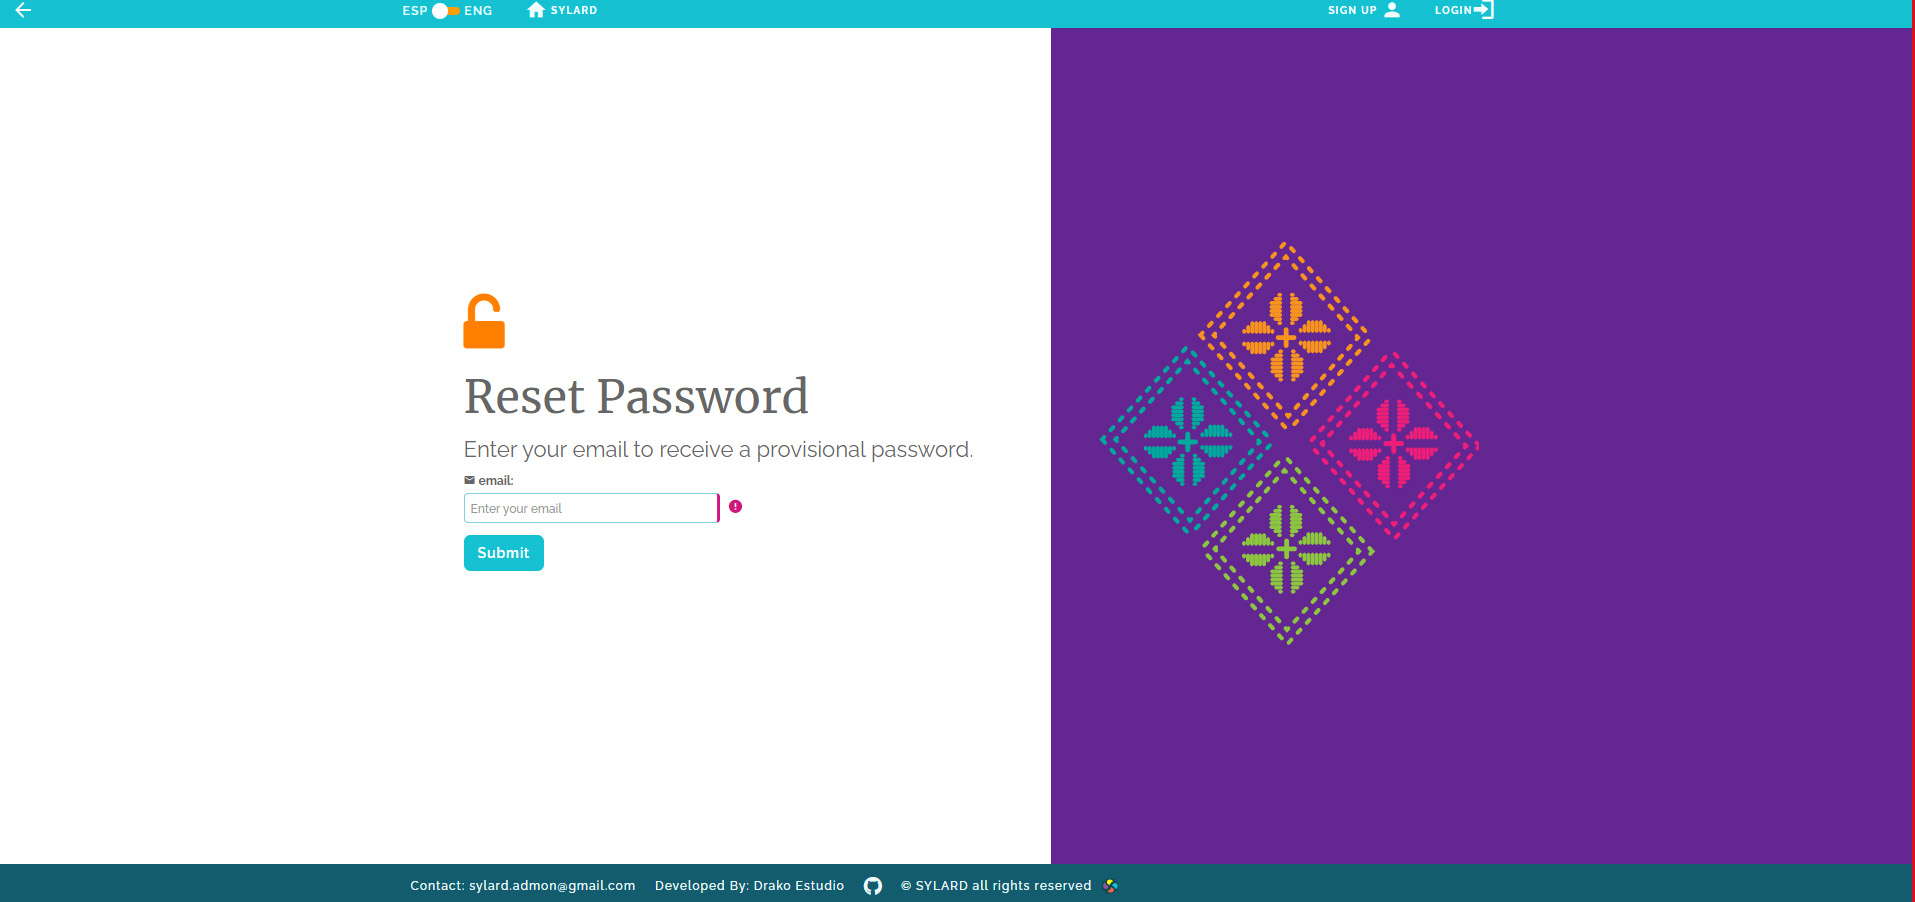
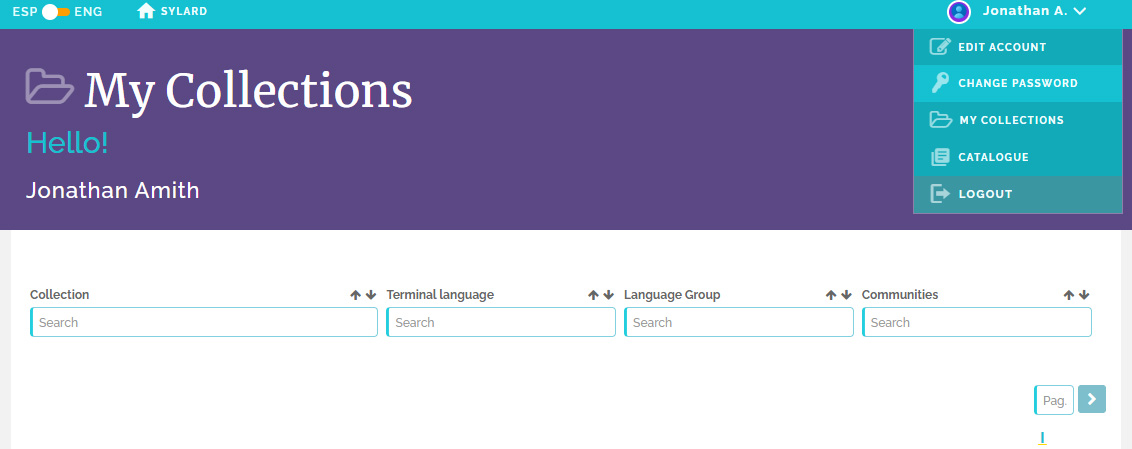
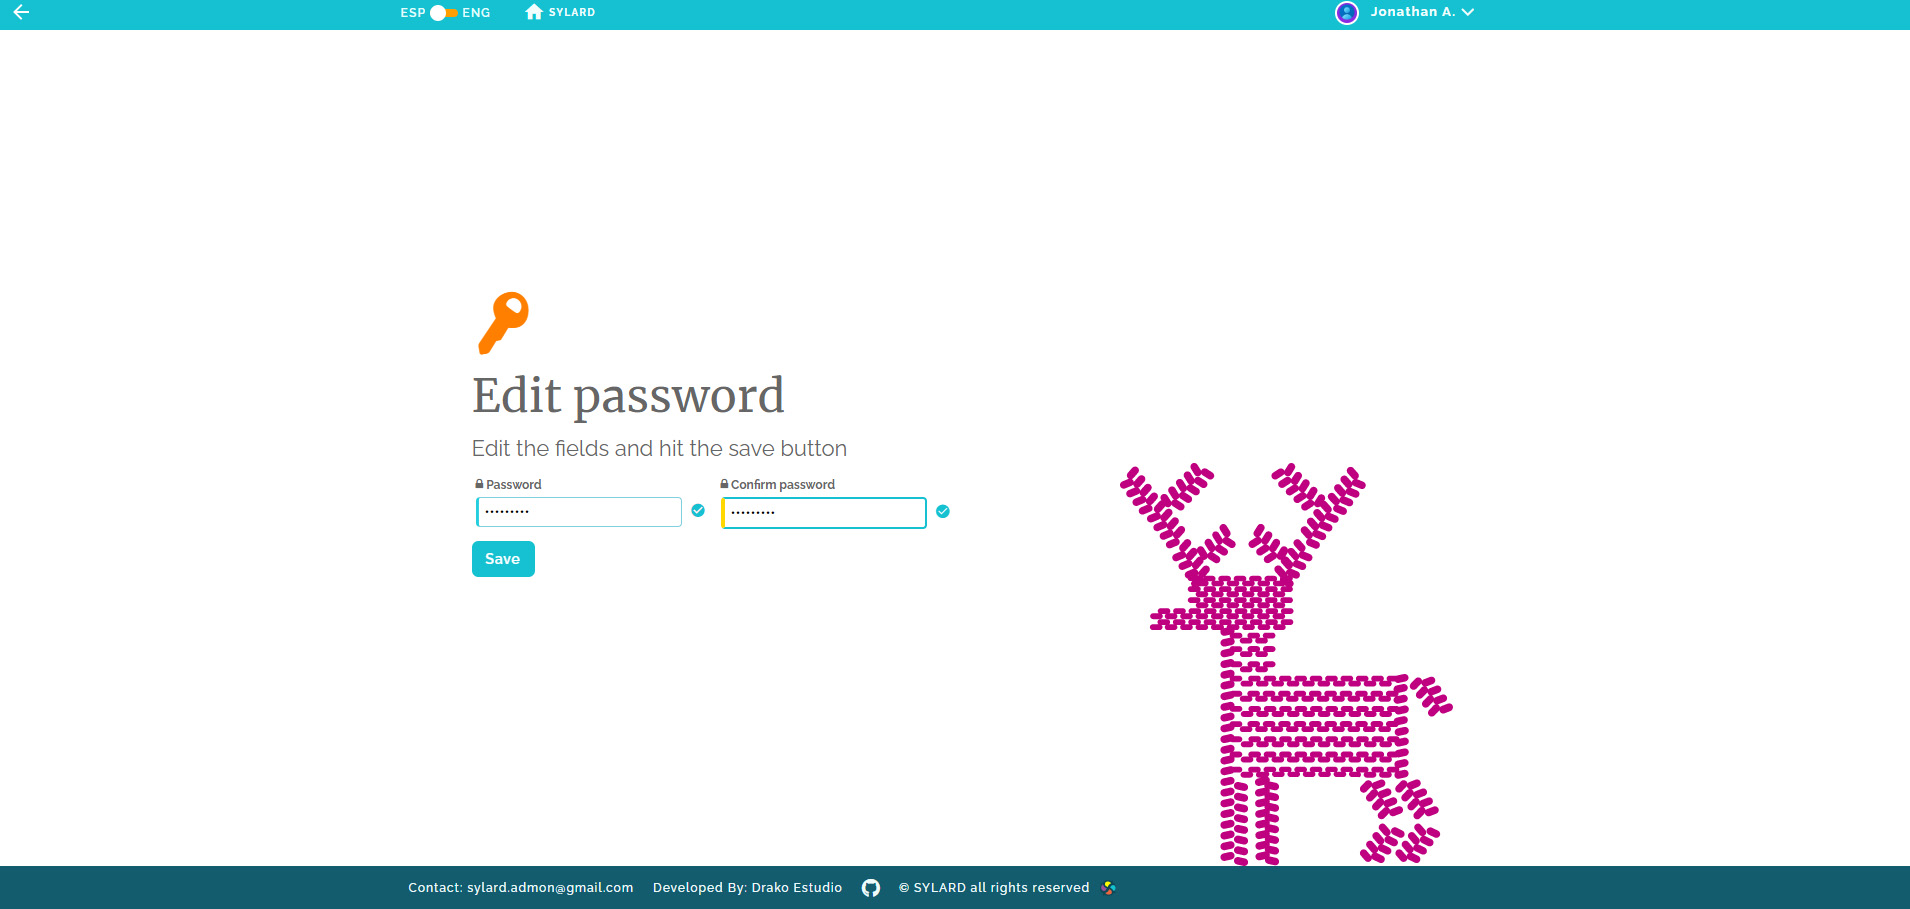
Después de dar clic en ¿Se le olvidó su contraseña? (texto en azul en la parte inferior de lafigura 14), el Usuario es llevado al módulo para el restablecimiento de su contraseña (verfig. 15). El Usuario deberá primero ingresar su correo electrónico registrado y dar clic en Enviar. Una contraseña temporal se envía entonces a su correo registrado (fig. 16). El usuario debe usar esta contraseña temporal para iniciar una sesión (fig. 17). Una vez que ha iniciado la sesión, el Usuario puede ir al menú desplegable (figura 18) en la esquina superior derecha y seleccionar la opción Cambiar contraseña. Al seleccionar esta opción, el Usuario es llevado a la pantalla de cambio de contraseña (fig. 19) donde se deberá ingresar una nueva contraseña y repetirla para confirmar.
El texto de este manual continúa inmediatamente arriba de lafigura 20.


Etapa 5:Creando una colección
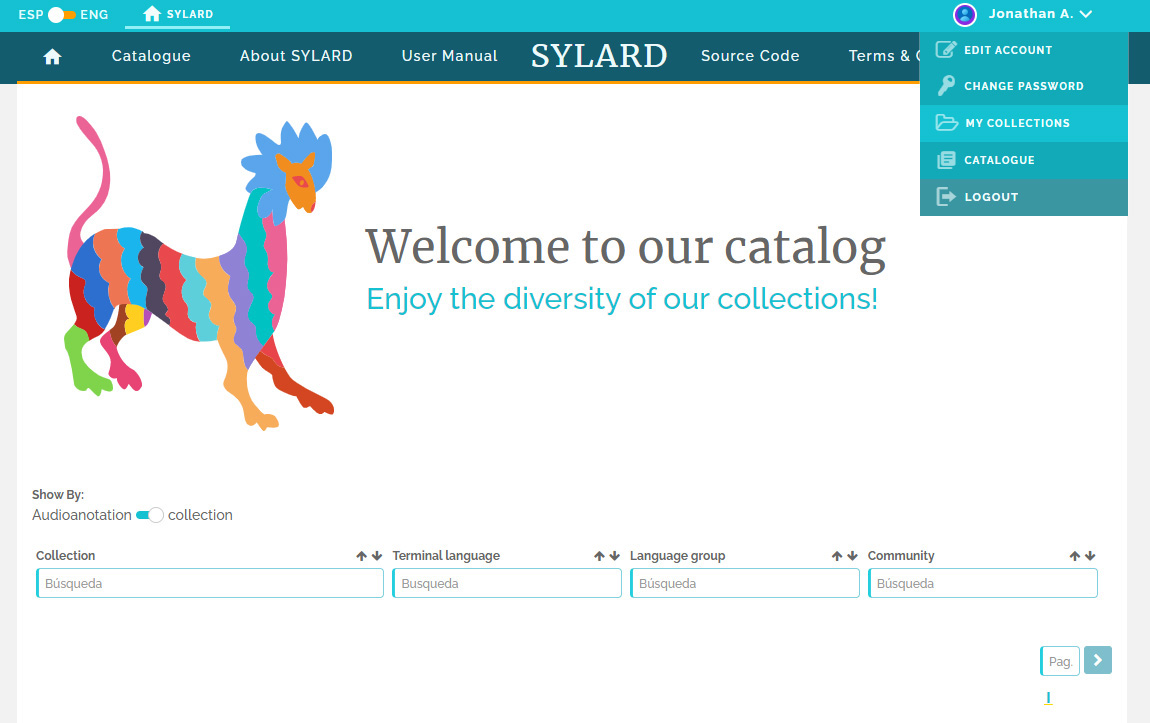
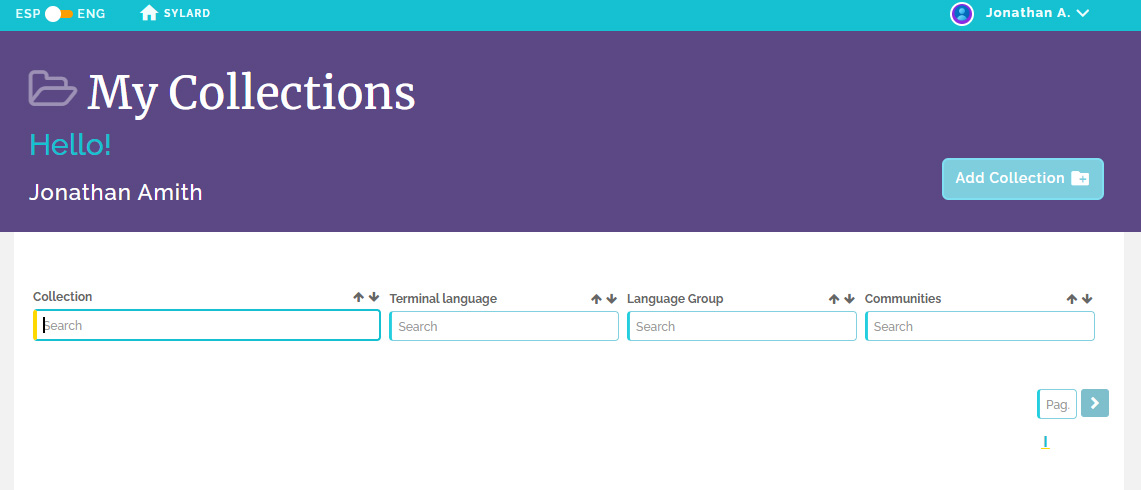
Una vez iniciada la sesión (con la contraseña original o la nueva) el Contribuyente será llevado a la página del Catálogo si aún no tiene colecciones en SYLARD (fig. 20). Si ya ha subido audio anotado en una o más colecciones en su lugar se le llevará a su página de Mis colecciones con las colecciones listadas (fig. 21). Para agregar una colección, si es Colaborador nuevo puede hacer clic en 'Agregar colección' del menú desplegable (fig. 20), mientras que los Contribuyentes con una o más colecciones ya en SYLARD, pueden hacer clic en el botón Agregar colección localizado en el encabezado púrpura en la página Mis colecciones (fig. 21).
El texto del manual continúa arriba de lafigura 23.

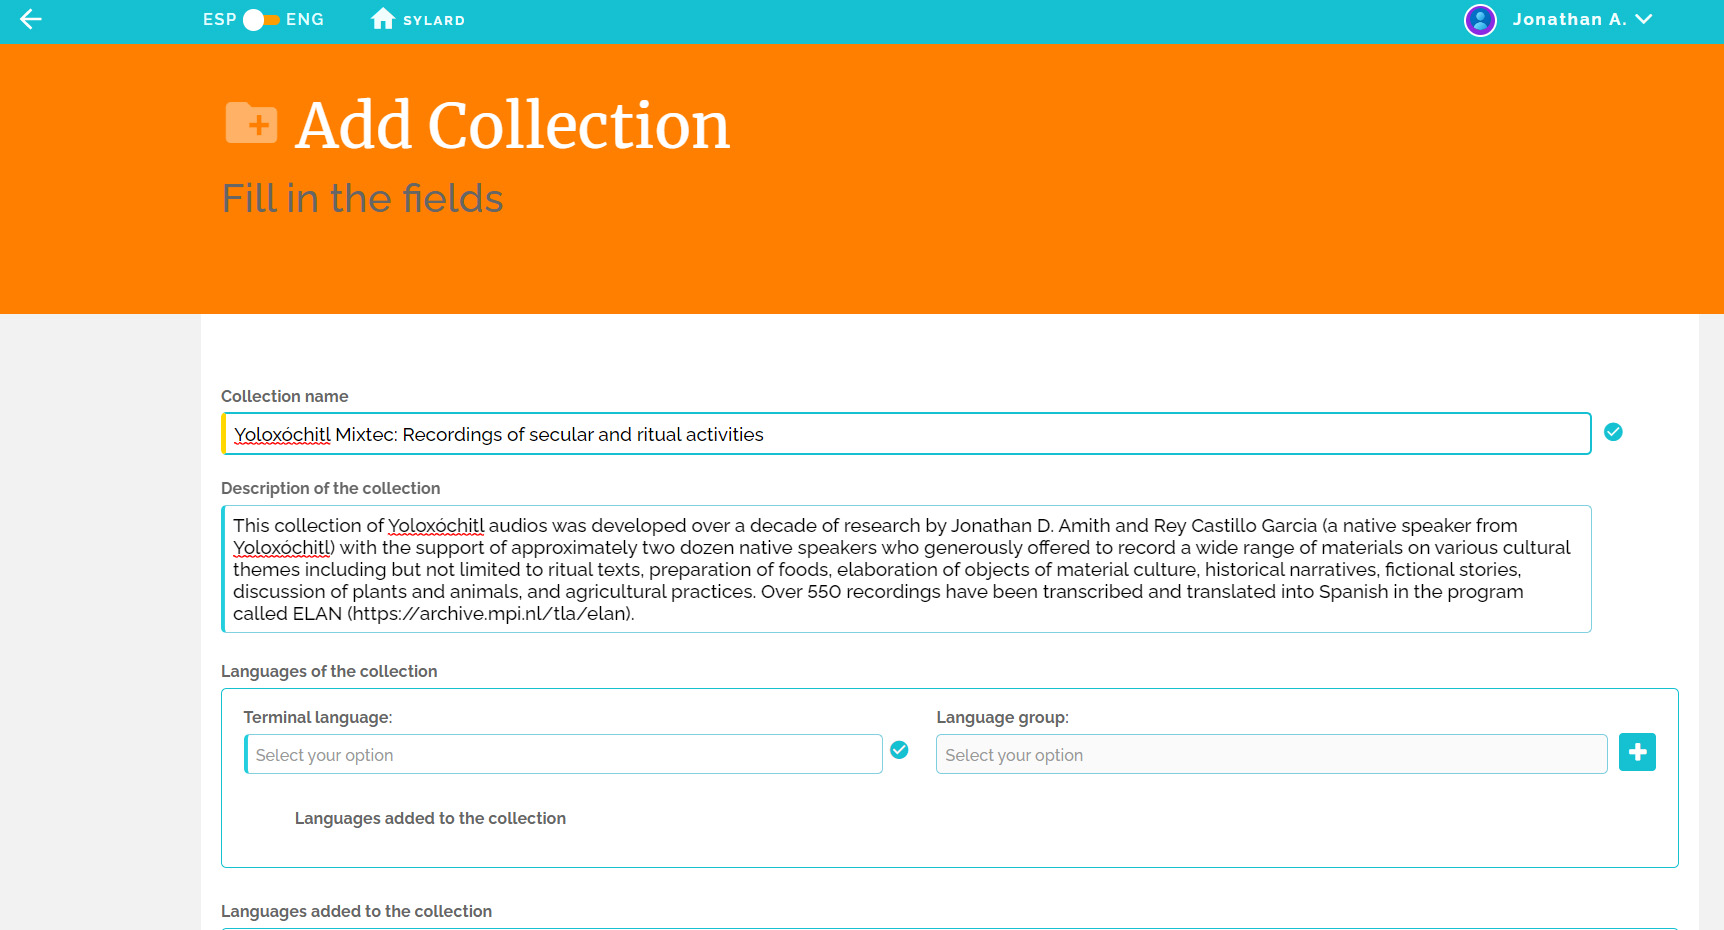
Después de hacer clic en la opción Agregar colección como en lafigura 21(para Contribuyentes nuevos) o en la opción Agregar colección como en lafigura 22(para Contribuyentes con colecciones ya integradas en SYLARD), el Contribuyente será llevado a la plantilla Agregar colección,figura 23. A continuación se explica cómo se deberá llenar esta plantilla.

Titulo y descripción
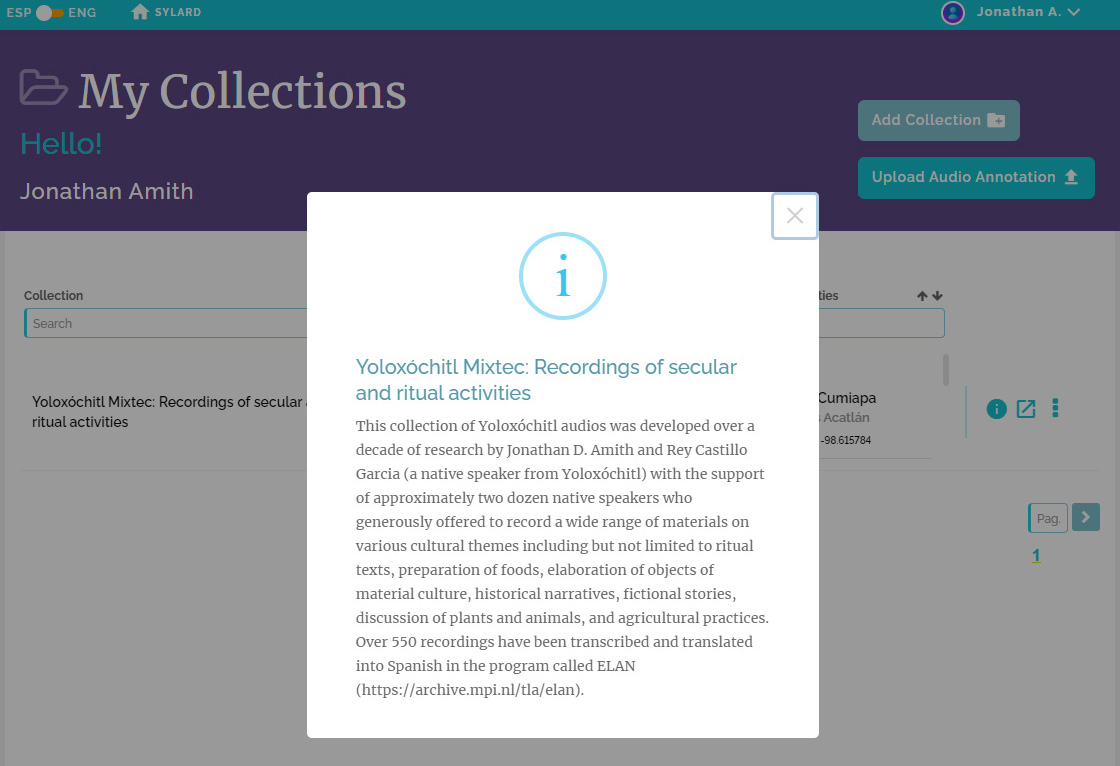
El primer paso es dar a la colección un nombre corto y una descripción. El número de caracteres en el nombre (500) y en la descripción (1000) son limitados por razones de espacio. El nombre y la descripción, junto con otra información en la base de metadatos de Mi Colección puede ser editada en cualquier momento (verfigura 37: Editar metadatos).
Tenga en cuenta que la descripción de la colección está disponible para cualquier usuario haciendo clic en la “i” minúscula (para información) dentro del círculo, ubicado a la izquierda de los tres puntos verticales próximos al nombre del proyecto en el catálogo (verfig. 33).
Una vez agregado el nombre y la descripción, el Contribuyente procede a ingresar los datos del idioma (grupo lingüístico, lengua terminal, comunidades incluidas). Este proceso se ilustra en las figuras25a31. El paso final es adjuntar una licencia de derechos para la nueva colección de SYLARD (fig. 32). Actualmente sólo dos licencias,Creative Commons, están disponibles. En el futuro otras licencias podrán ser agregadas, incluyendo licencias TK (Traditional Knowledge), (verhttps://localcontexts.org/licenses/traditional-knowledge-licenses).
Los metadatos de la lengua y la comunidad que se agregan en las capturas de pantalla de las figuras25a31se seleccionan de una lista de vocabularios controlados que derivan de Glottologhttps://glottolog.org/) y de la base de datos mexicana deINEGI(Instituto Nacional de Estadística y Geografía). Esto permite la funcionalidad de autocompletar desde un menú desplegable.
El contribuyente comienza agregando lo que se llama la lengua terminal, esto es, el nivel específico de clasificación de la lengua que se documenta en la colección que se está agregando a SYLARD.
Lengua terminal
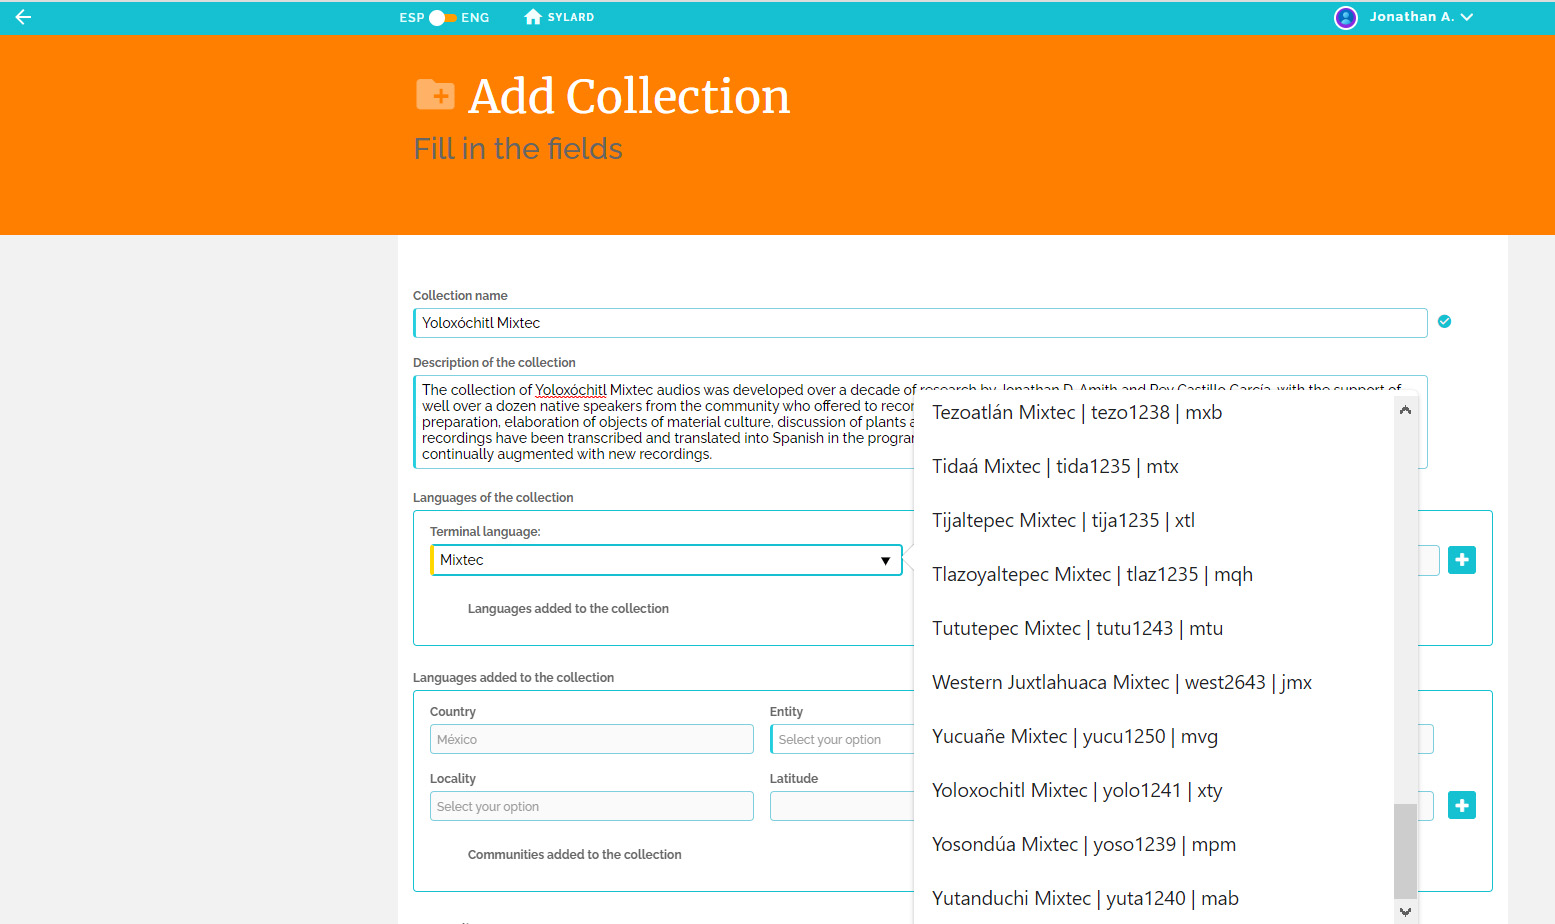
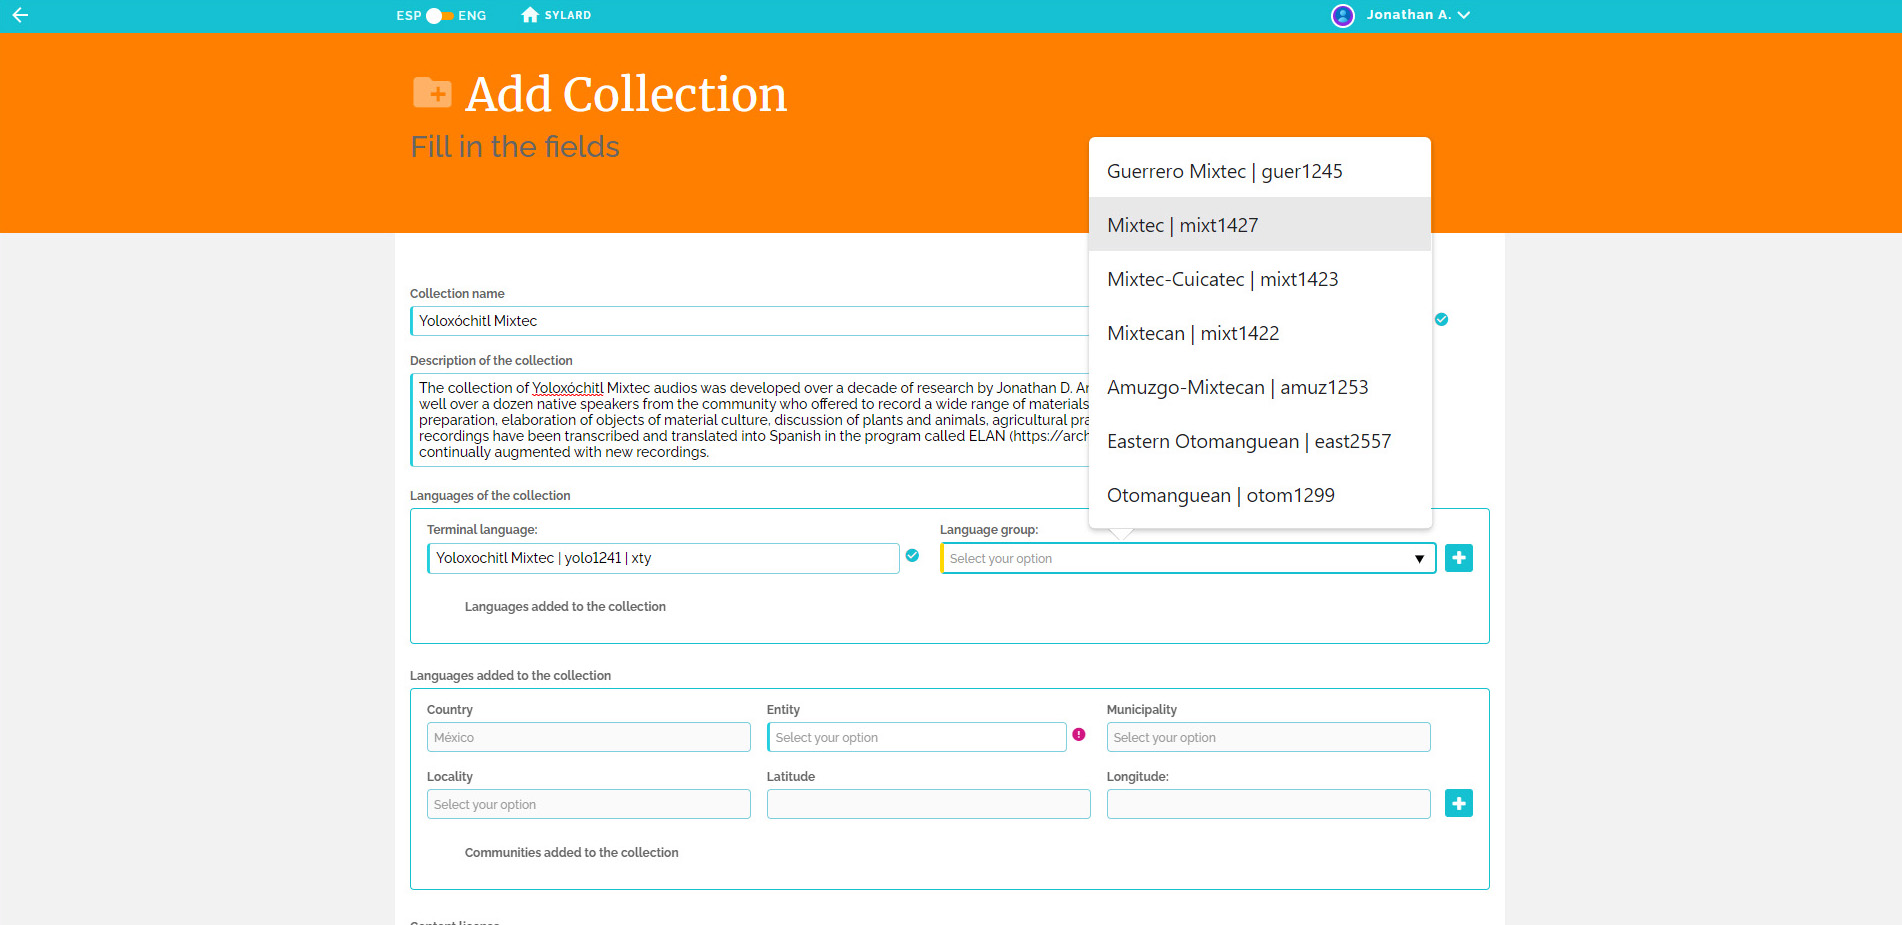
Conforme el Contribuyente comienza a escribir la lengua terminal, en este caso una lengua mixteca, después de ingresar cuatro caracteres, SYLARD proporciona una lista de lenguas mixtecas tomadas deGlottolog(fig. 25). El Contribuyente puede entonces simplemente hacer clic sobre alguna de las lenguas terminales en el menú desplegable.
El texto de este manual continúa inmediatamente arriba de lafigura 28.
Grupo de lenguas
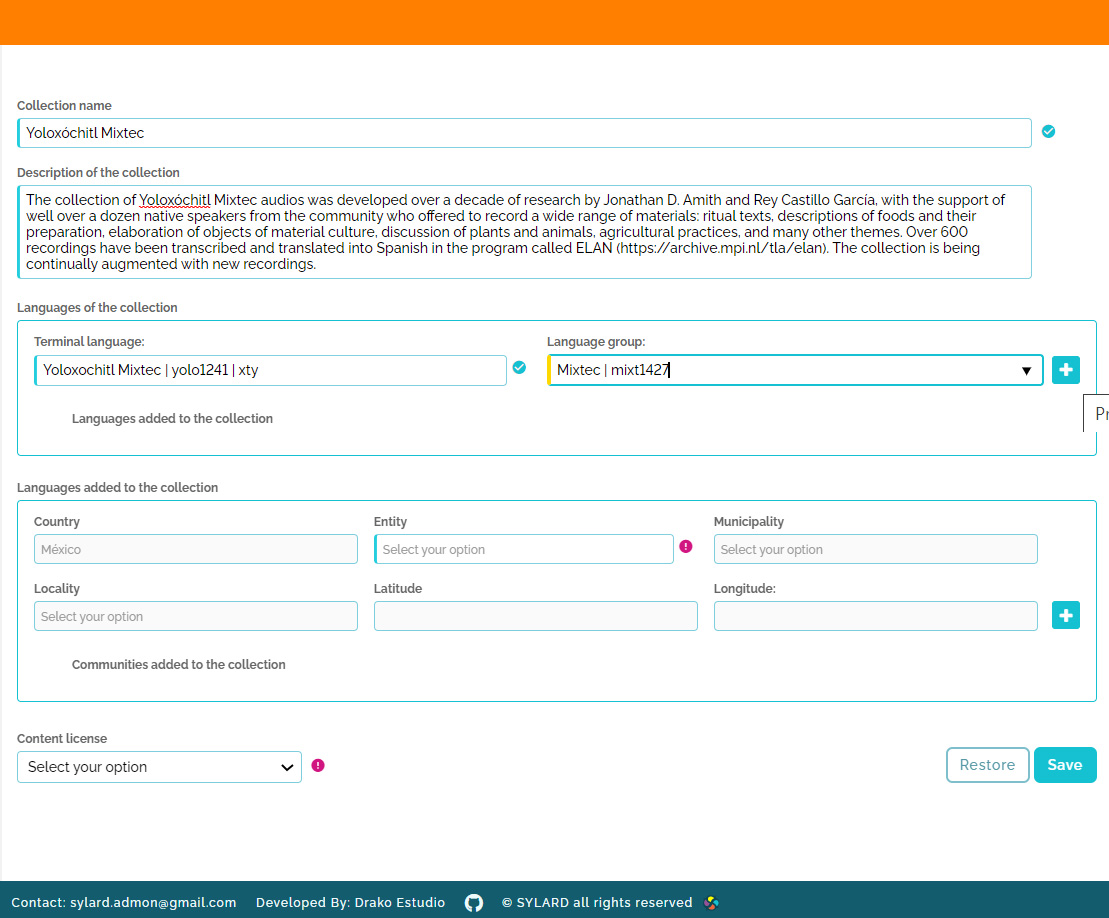
Ingresada la Lengua terminal, la lista desplegable del Grupo de lenguas muestra solamente los nodos en Glottolog arriba de la Lengua terminal seleccionada. LaFigura 26muestra los niveles ascendentes para el Mixteco de Yoloxóchitl: Mixteco de Guerrero, Mixteco, Mixteco-Cuicateco, Mixtecano, Amuzgo-Mixtecano, Otomangue Oriental, Otomangue. El Contribuyente es libre de seleccionar un nodo de un nivel bajo ya que estos se limitan a agrupar lenguas terminales más estrechamente relacionadas.NOTA: Es necesario hacer clic en el + junto al Grupo de lenguas para que la Lengua terminal y Grupo de lenguas se agreguen a la base de datos(verfig. 28: Lenguas agregadas a la colección)
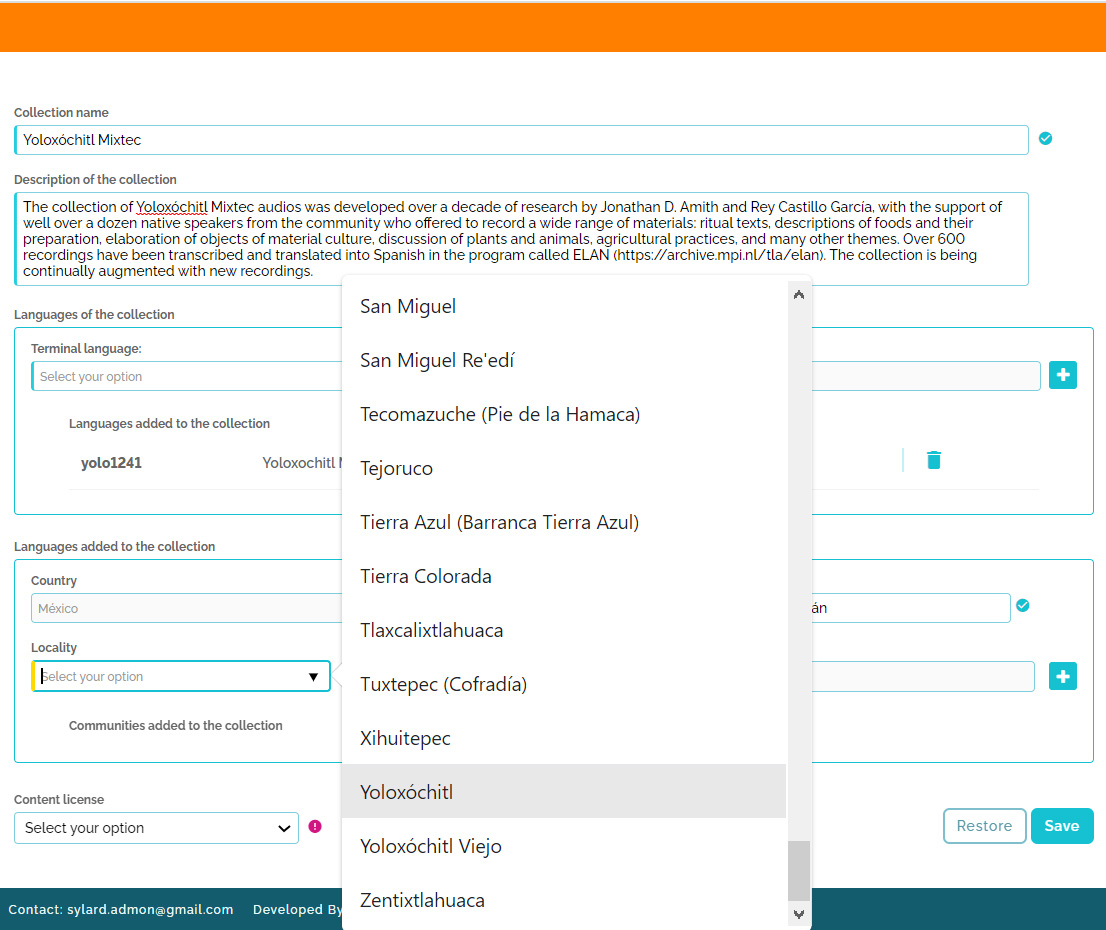
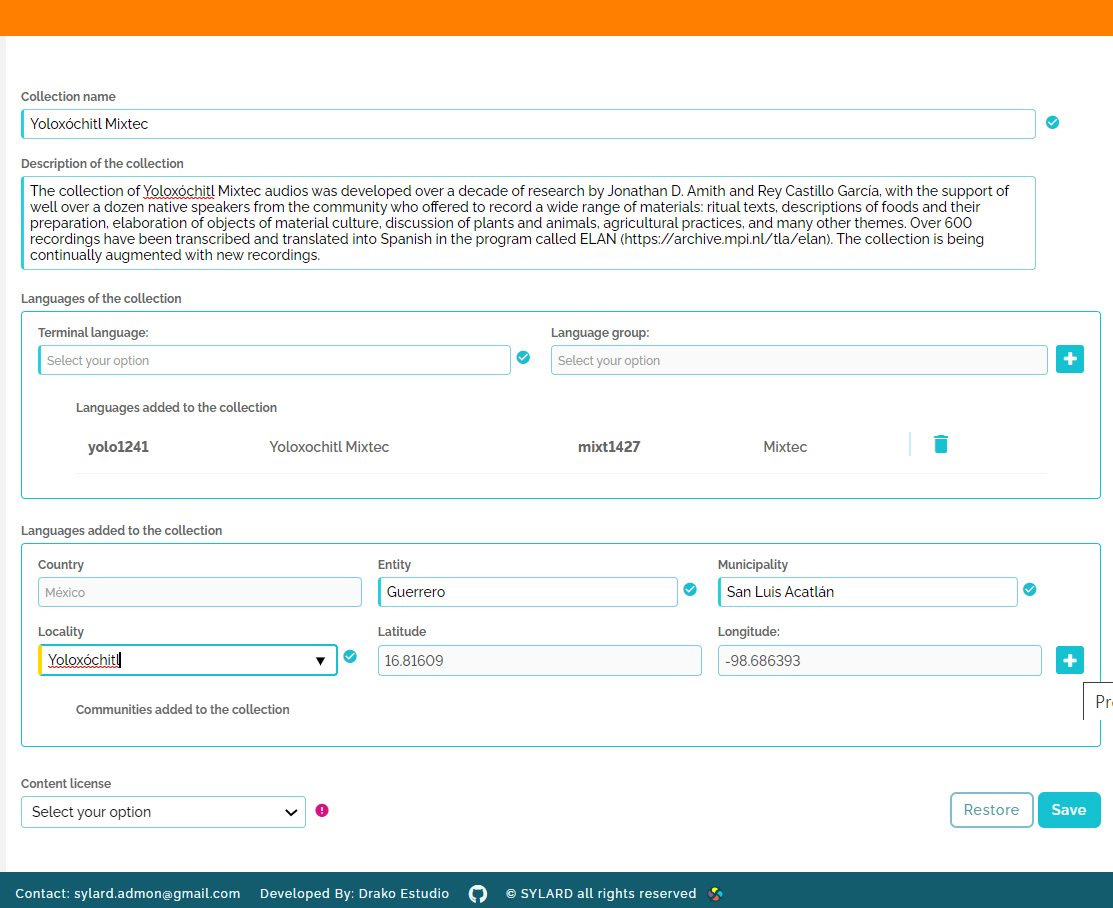
Geografía
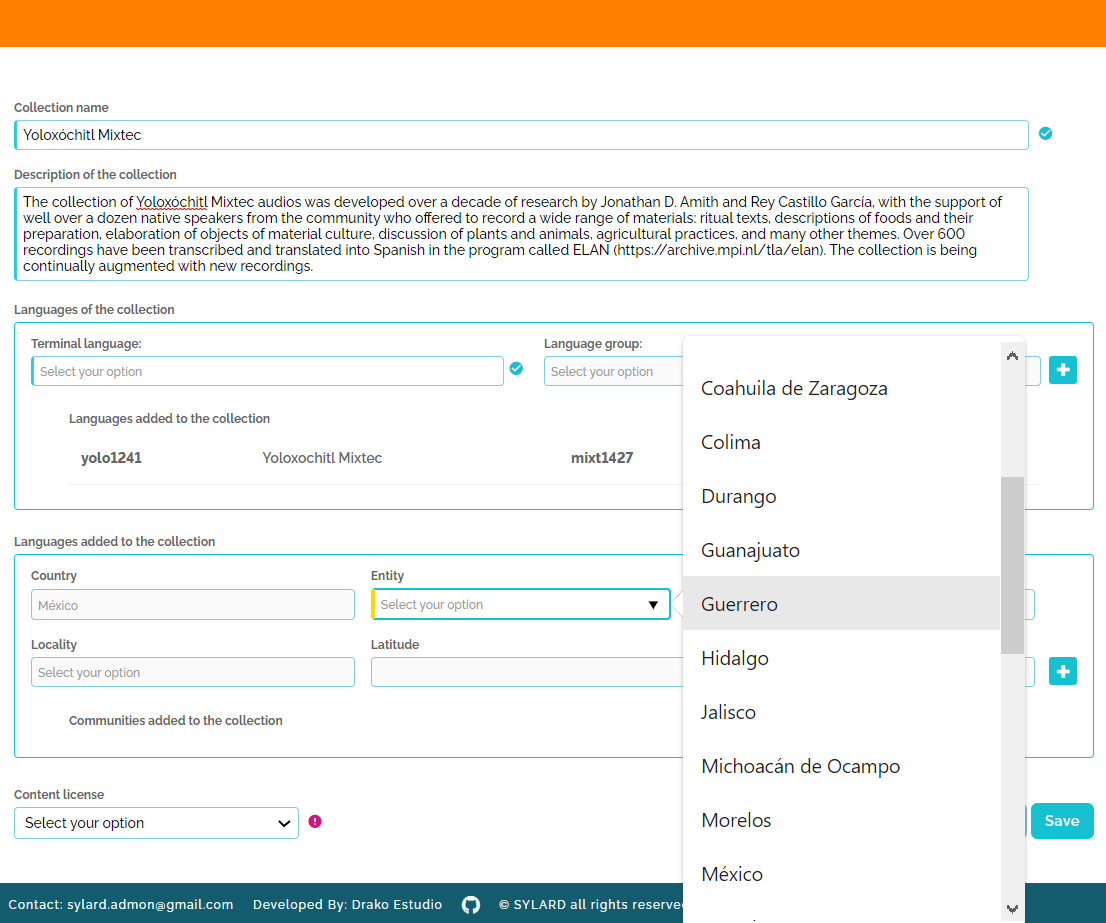
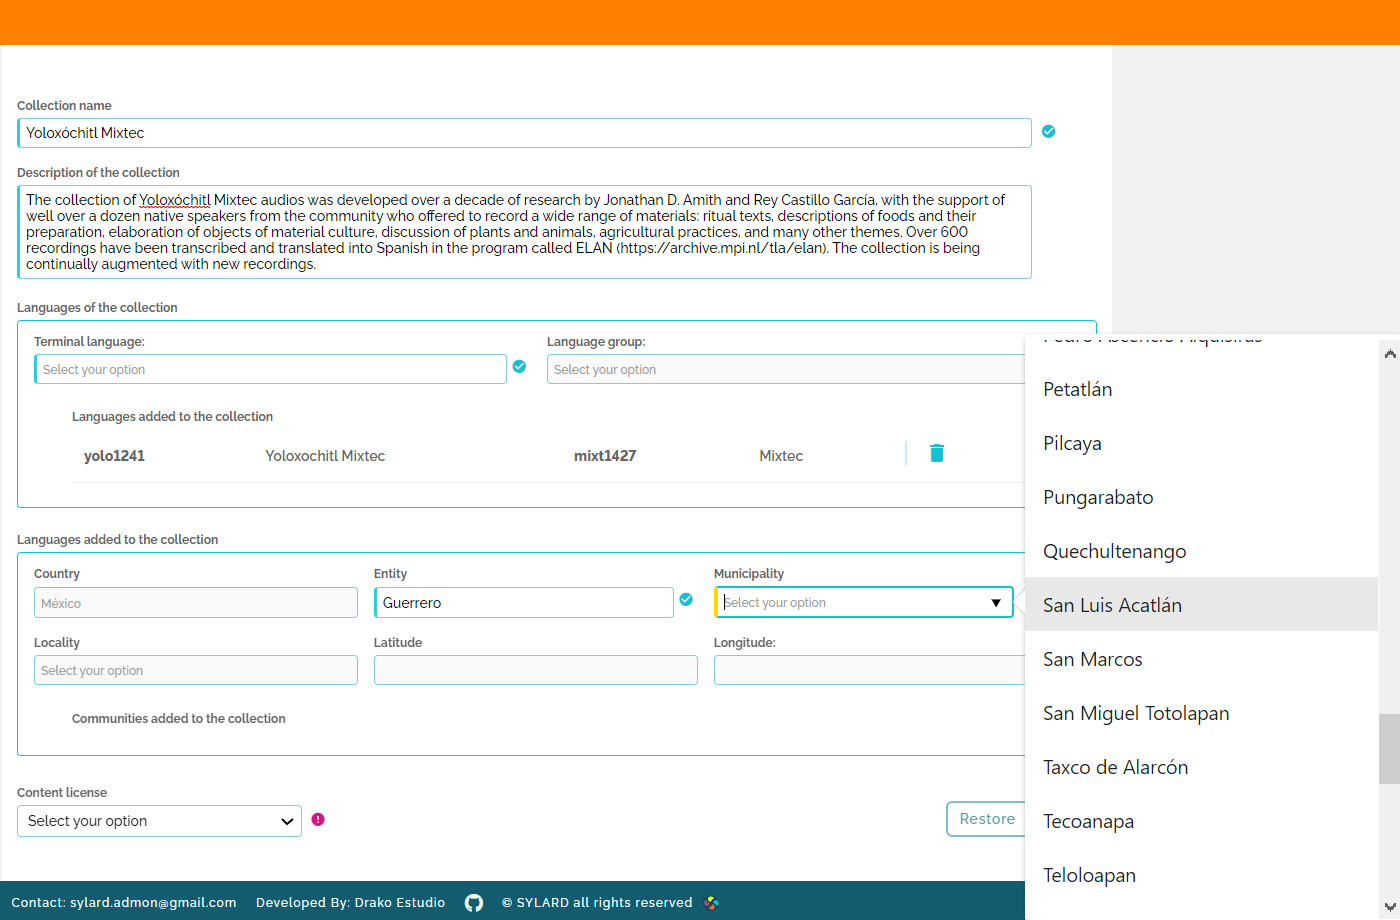
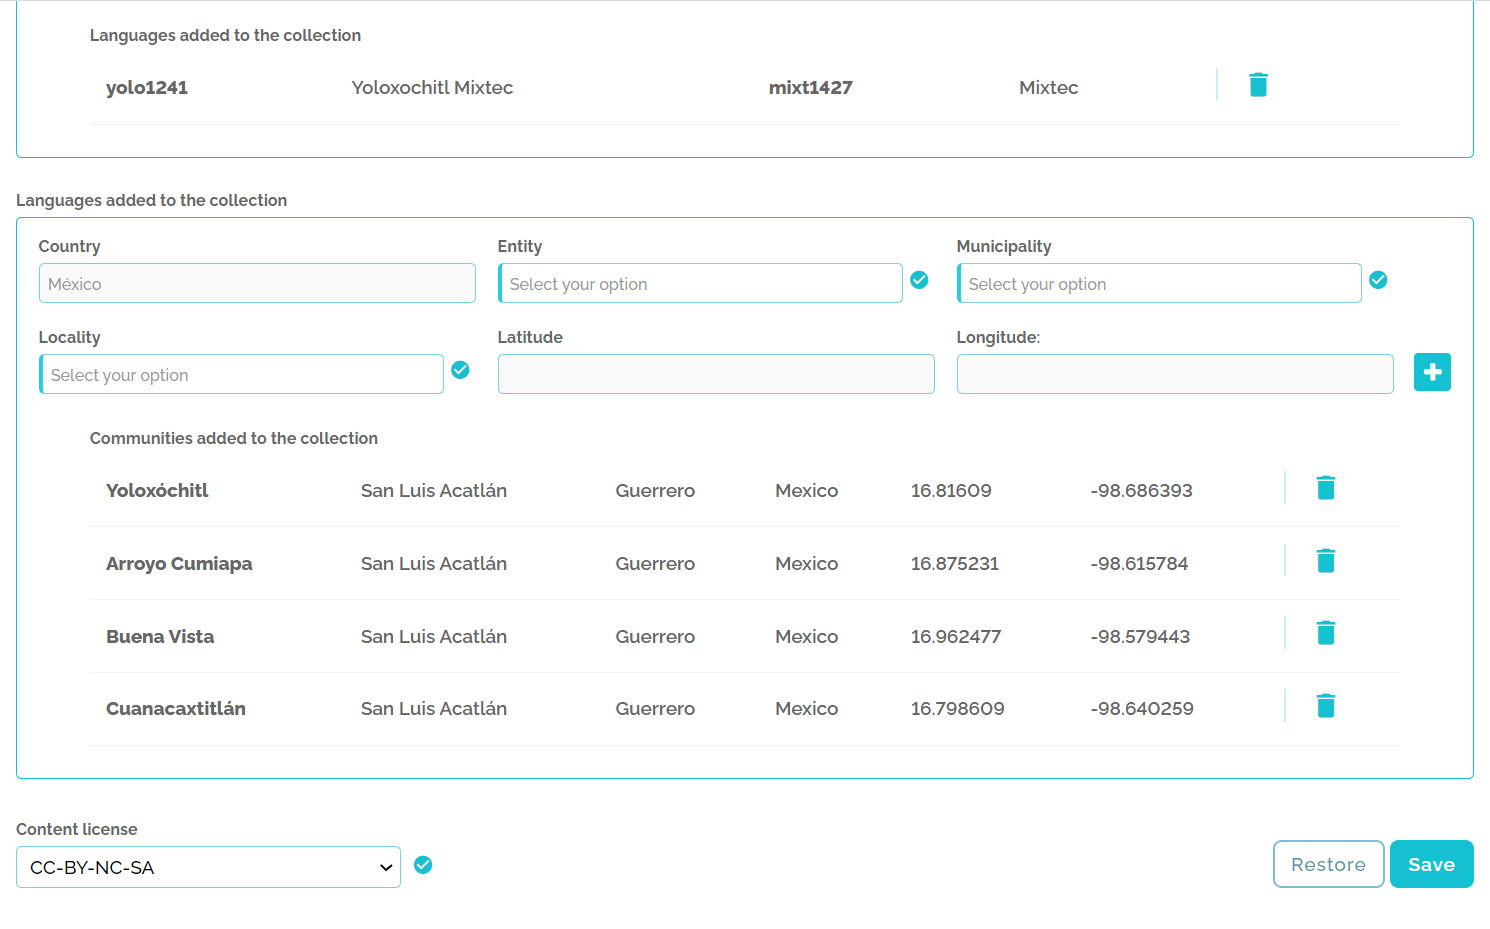
Este conjunto de metadatos incluye País, Entidad (en este caso Estado), Municipio, Localidad, y Latitud y Longitud. Para Mesolex el país se completa automáticamente como “México”. De ser necesario eventualmente se agregará Guatemala. Como el país es precargado, el menú desplegable de Entidad (fig. 28) proporciona una lista de los estados que se seleccionan dando clic sobre la entidad apropiada. A su vez, al seleccionar el Estado, el menu desplegable de Municipio es automáticamente habilitado. Finalmente, después de seleccionar el Municipio, el menú desplegable de Localidad se filtra para aquellas localidades (villas, agencias, etc.) que el INEGI ha establecido para el municipio seleccionado. Una vez que se ha seleccionado la Localidad del menú desplegable (fig. 29), la latitud y longitud se insertan automáticamente en la plantilla de metadatos para esta colección.NOTA: Es necesario hacer clic en el signo más (+) junto a Longitud para agregar la información geográfica a la base de datos(verfig. 32: Comunidades agregadas a la colección).
El texto de este manual continúa inmediatamente debajo de lafigura 31.
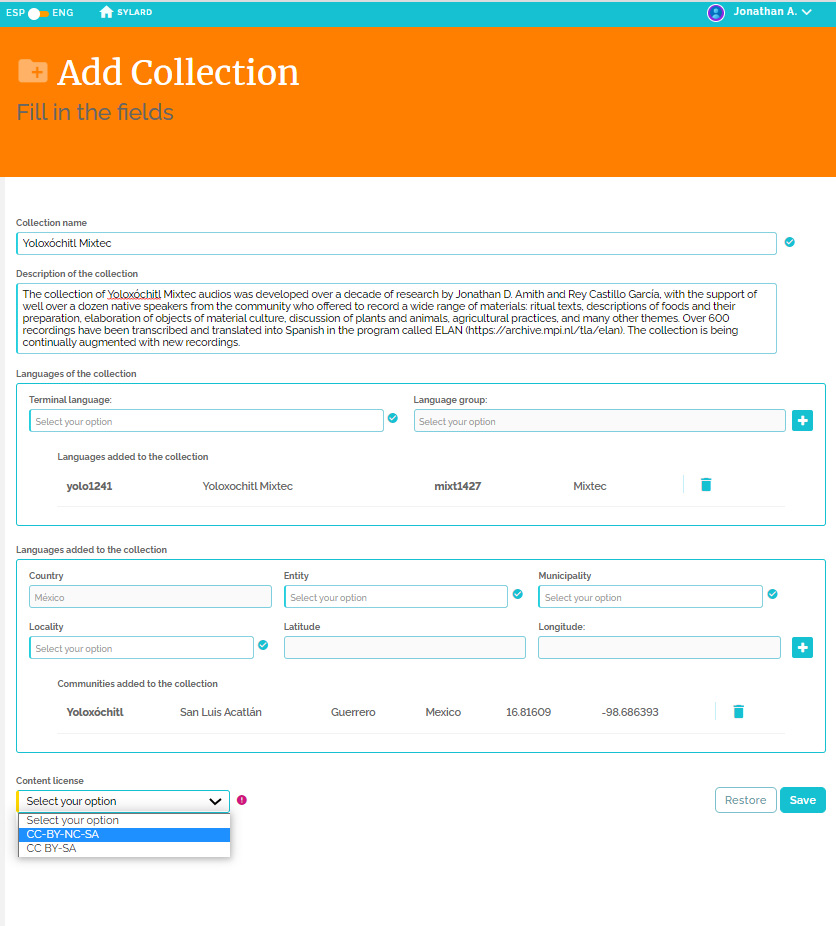
Licencias
El último aspecto que se debe ingresar son los términos para la Licencia de Contenido (verfig. 32). Actualmente sólo hay dos opciones ambas de Creative Commons. A medida que continúe el desarrollo de este portal se agregarán licencias de Traditional knowledge.
Agregando múltiples comunidades a la base de datos de la colección
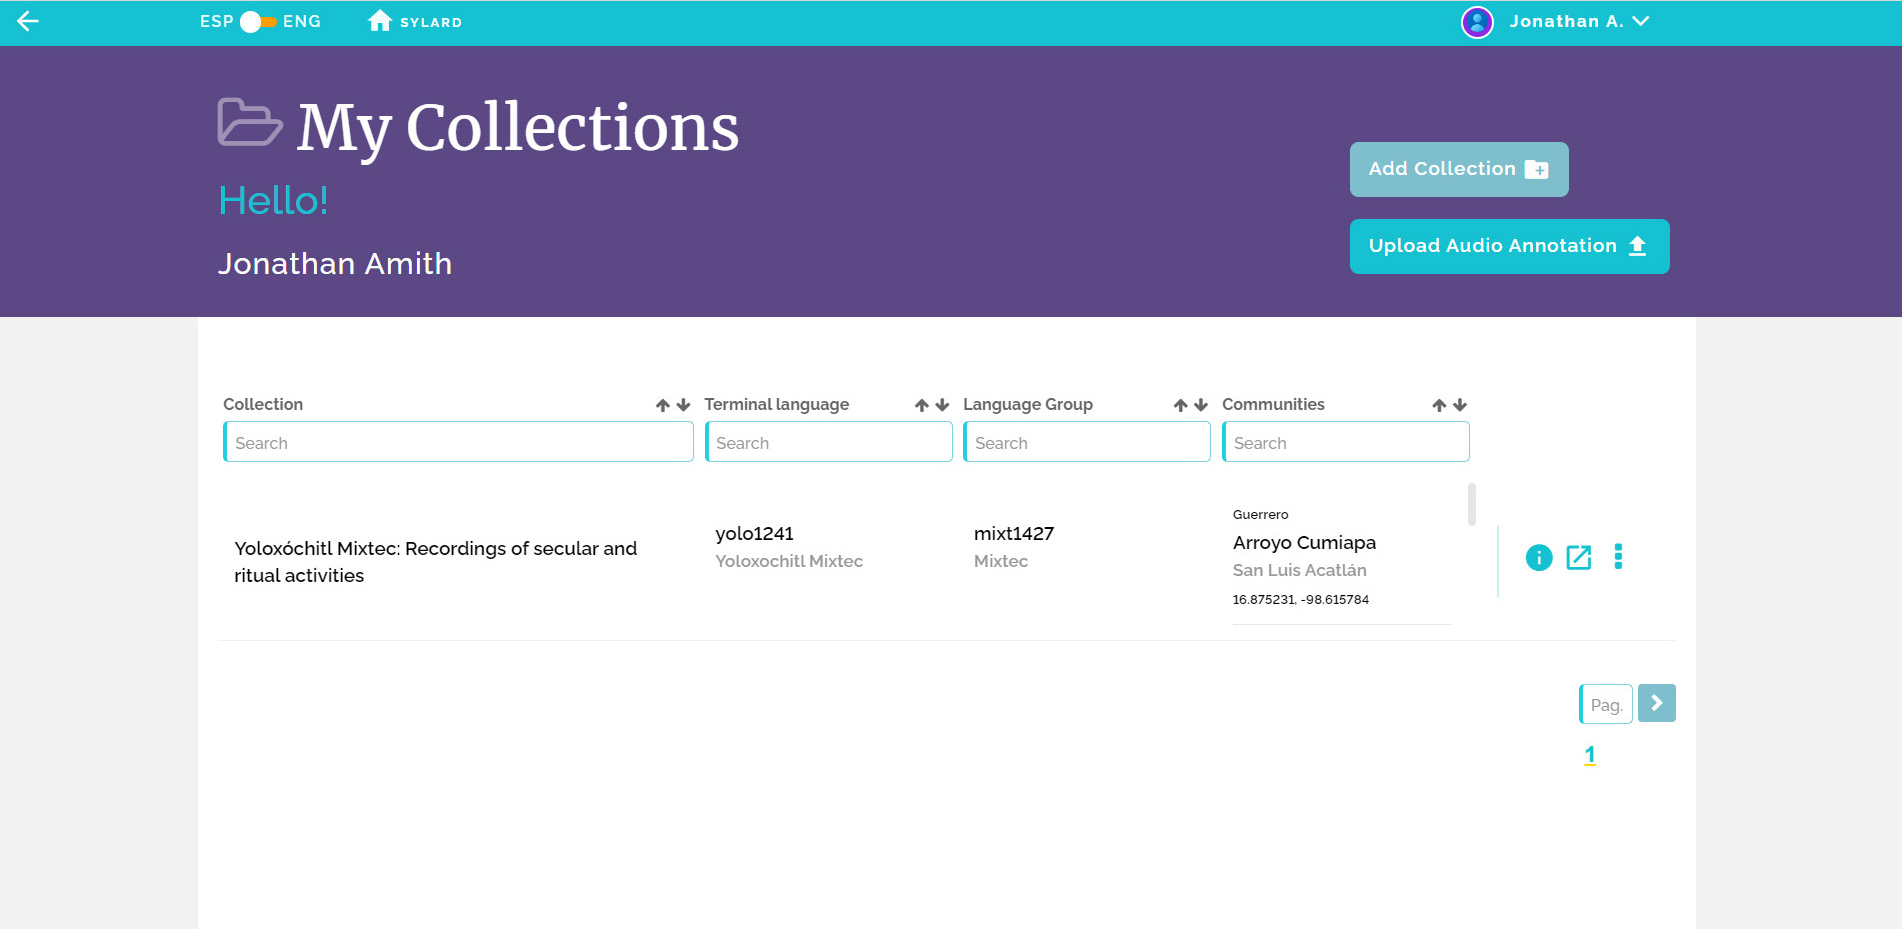
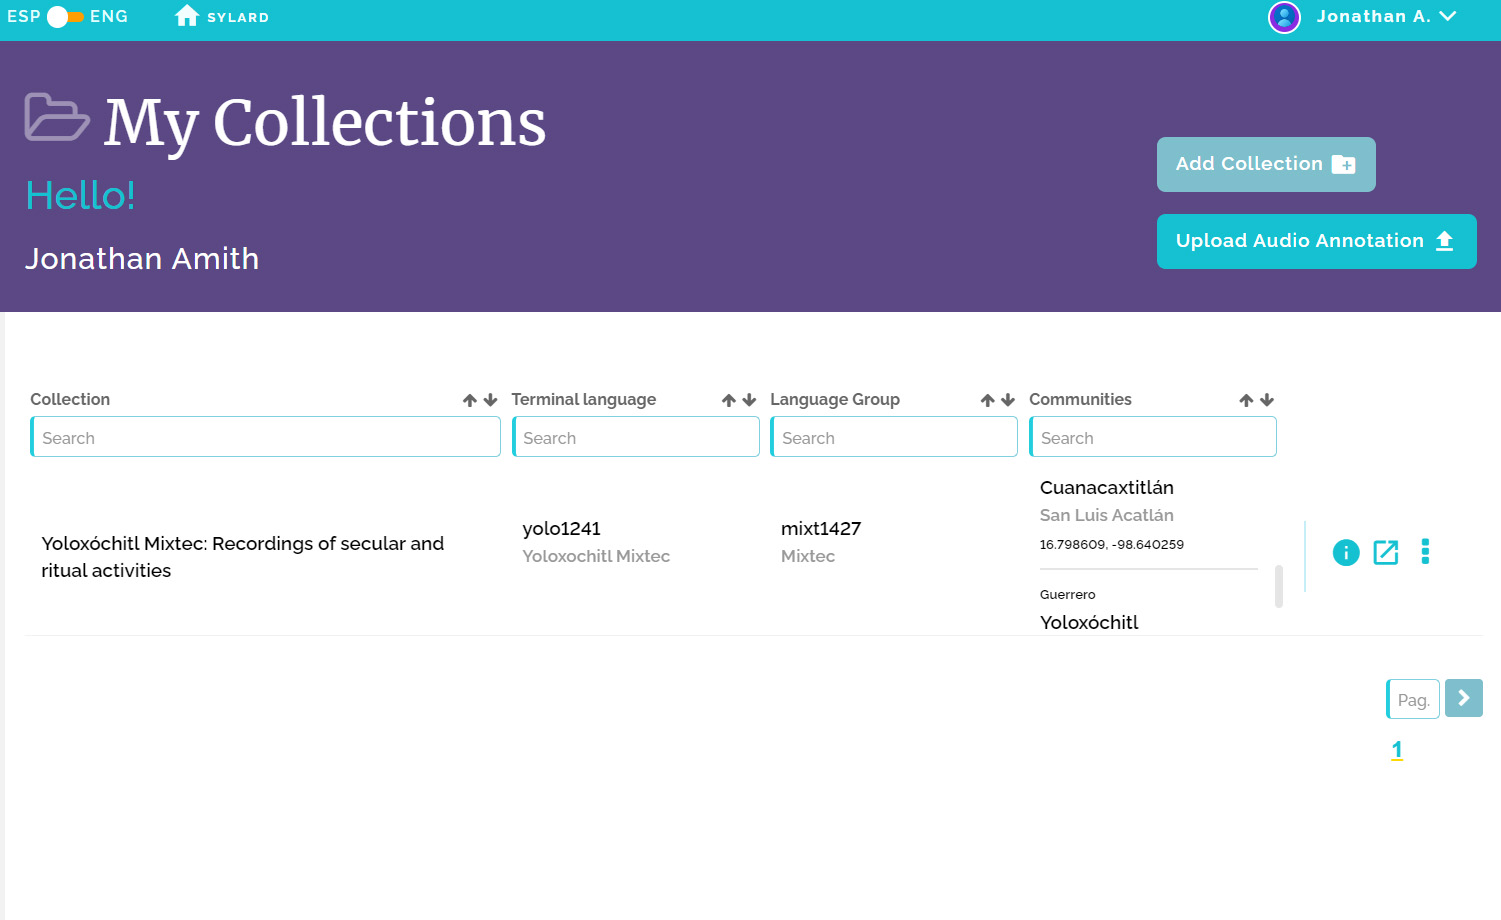
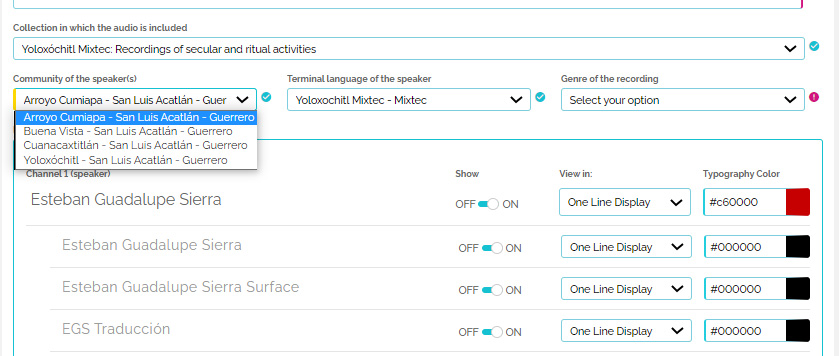
Los pasos ilustrados en las capturas de pantalla figuras 25 a 32 se pueden repetir dentro de una misma colección para agregar múltiples comunidades. De hecho, a menudo sucede que incluso una colección individual de un investigador pueda incluir material de múltiples comunidades cercanas. SYLARD puede manejar esta situación. Lafigura 34ilustra cómo aparece una colección con un total de cuatro comunidades agregadas. Las figuras35y36ilustran como las múltiples comunidades aparecen en el catálogo. Véase la columna Comunidades a la derecha de la pantalla. La barra deslizante gris, a la derecha de la cuarta columna, se puede mover para mostrar las cuatro comunidades, listadas en orden alfabético: Arroyo Cumiapa, Buena Vista, Cuanacaxtitlan y Yoloxóchitl.
Editando metadatos de la colección y agregando nuevo audio
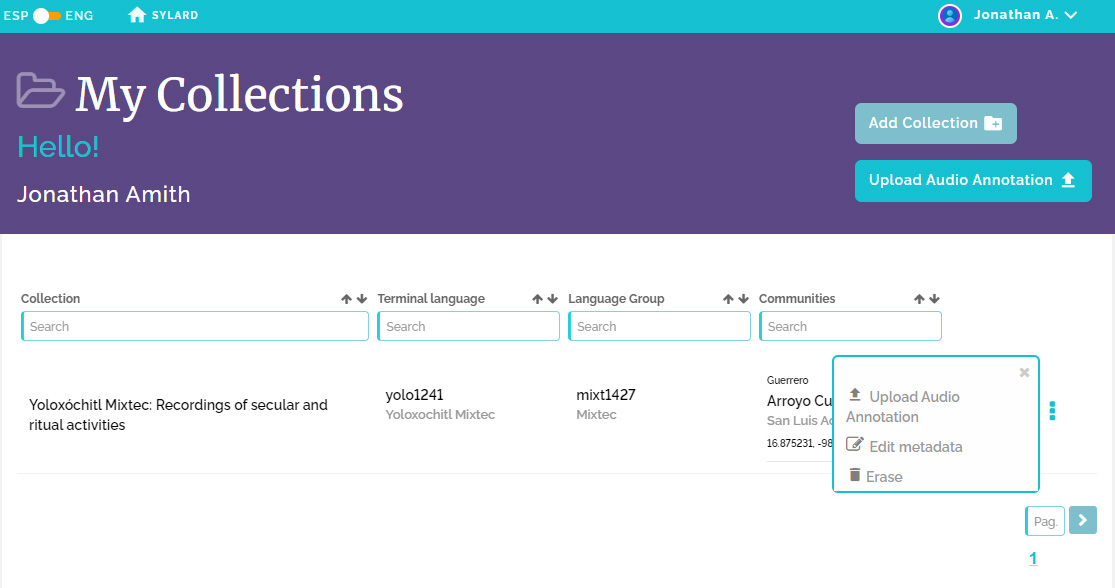
Después de que la colección se ha llenado con audio anotado, aún es posible editar los metadatos de la colección (para editar los metadatos de audio anotado, consulte lafigura 37). Los metadatos de la Colección pueden ser editados por un Contribuyente en cualquier momento simplemente iniciando una sesión en SYLARD y yendo a la colección correspondiente (ver, p. ej.,fig. 37). Haciendo clic en la opción Editar metadatos (la opción está en una ventana emergente que aparece al hacer clic sobre los tres puntos verticales) el Contribuyente es llevado a la plantilla Metadatos de la colección (fig. 32) desde donde se pueden editar y guardar los cambios en los metadatos. Nuevos audios anotados también se pueden agregar en cualquier momento dando clic en el rectángulo azul que dice Cargar audioanotación. Este proceso se explica a abajo.
El texto de este manual acerca de cargar audioanotaciones se presenta debajo de lafigura 37.
Etapa 6:Cargando audioanotación a una colección
El paso final en la creación de una colección es cargar/subir archivos ELAN con códigos de tiempo para cada anotación/transcripción/traducción al servidor de SYLARD (donde se convierte el formato XML de ELAN a HTML para una visualización en línea y reproducción de audio y anotaciones línea por línea) y al mismo tiempo vincular la anotación al audio en formato .mp3 en un servidor seguro (https). Para acceder a la pantalla de inicio para cargar, convertir los archivos ELAN (XLM a HTLM) y vincularlos a los audios .mp3, se hace clic en el botón Cargar audioanotación en la pantalla de Mis Colecciones (fig. 37, en la esquina inferior derecha dentro del banner morado). Si el Contribuyente tiene ya varias colecciones, la carga se inicia haciendo clic sobre los tres puntos verticales a la derecha de la colección a la cual se agregará el audio (fig. 21, ventana emergente que ofrece al Contribuyente tres opciones: Cargar audioanotación, Editar metadatos, Borrar).
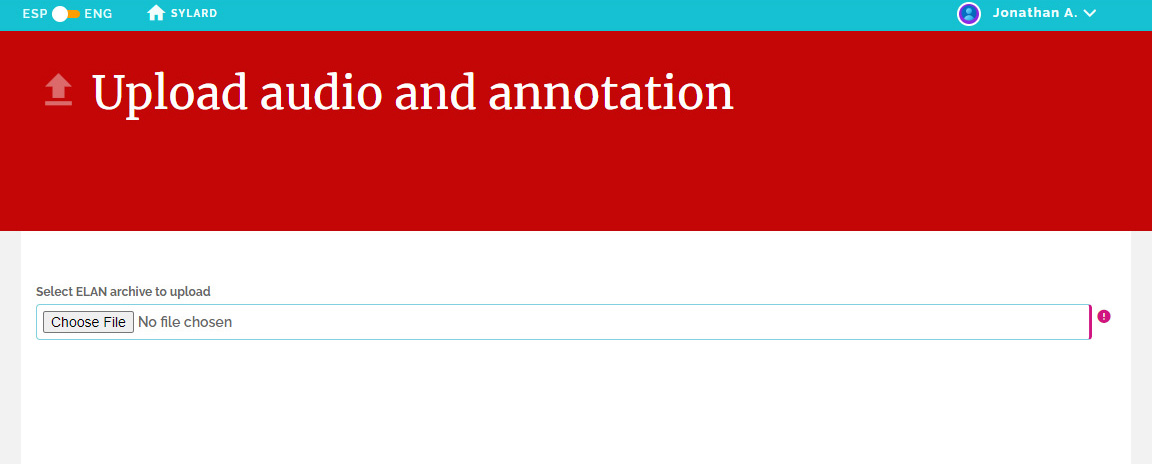
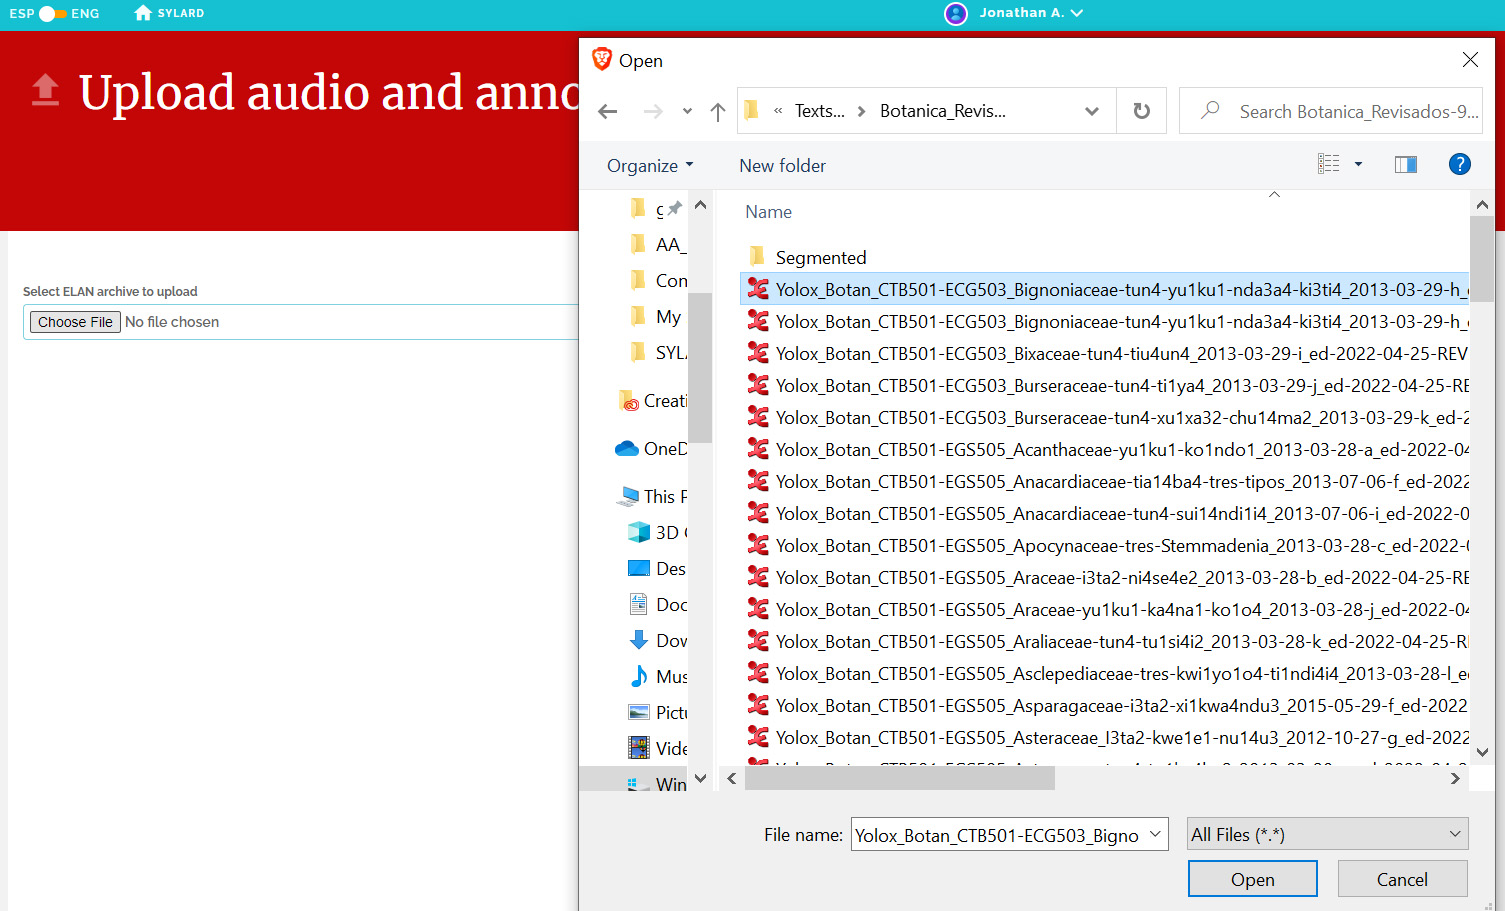
Paso 1:Seleccionando un archivo ELAN para cargar
El primer paso es seleccionar un archivo ELAN en una computadora local: Haga clic en Seleccionar archivo ELAN para subir (fig. 38), navegue al archivo deseado y haga clic en Abrir (fig. 39). Esto lleva al Contribuyente a una pantalla donde ingresará el título, descripción y visualización para la reproducción línea por línea de la audioanotación escogida.
Paso 2:Vincular la audioanotación de ELAN a un archivo .mp3, agregando un título y descripción para la pantalla de reproducción
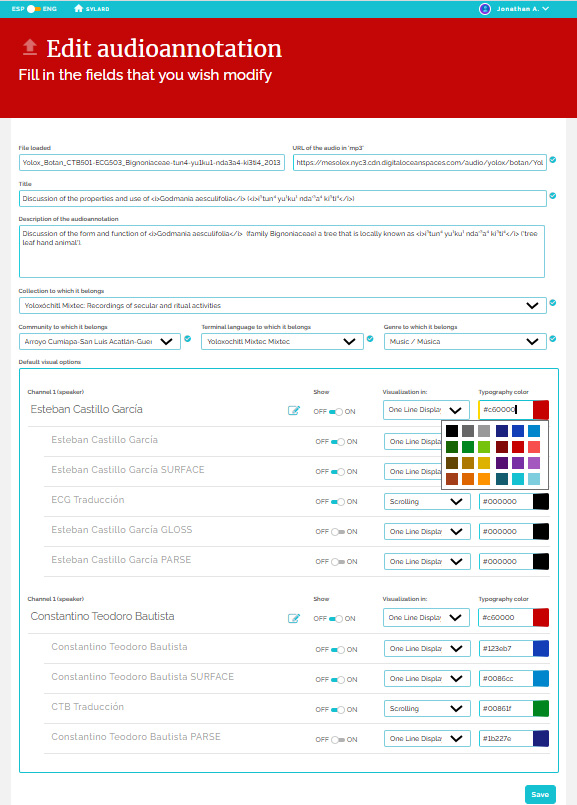
Una vez que el archivo ELAN se ha cargado a SYLARD y la pantalla de carga de audio y anotación correspondiente es generada (fig. 40), el segundo paso es que el Contribuyente ingrese la ruta URL completa al archivo .mp3 que ha sido anotado en ELAN. La ruta deberá ser completa y los archivos de sonido .mp3 deben estar en un servidor seguro (https). Tome en cuenta que aunque la anotación ELAN venga de un archivo .wav, para la reproducción en Internet se debe usar un archivo .mp3 derivado. El Contribuyente deberá dar un Título a la grabación (limitado a 120 caracteres) y además a una Descripción (limitada a 200 caracteres).
Nota: El Contribuyente puede incluir etiquetas HTML(p. ej., <i> y <b>) tanto en el Titulo como en la Descripción de la audioanotación. Éstos se representarán cuando el audio y la anotación se vean en línea (verfig. 45, por ejemplo). Considere que el nombre Mixtecoi³tun⁴ yu¹ku¹ nda’³a⁴ ki³ti⁴se ingresó en el formato con letra de molde, pero con la etiqueta HTML <i> a cada lado del texto que el Contribuyente quiere que se visualice en cursivas. También es importante tener en cuenta que todos los caracteres especiales, tales como números o letras en superíndices, deberán ingresarse como caracteres Unicode. Por ejemplo, los superíndices ¹, ², ³, y ⁴ tienen los siguientes códigos hexadecimales en Unicode: 00b9, 00b2, 00b3, 2074.
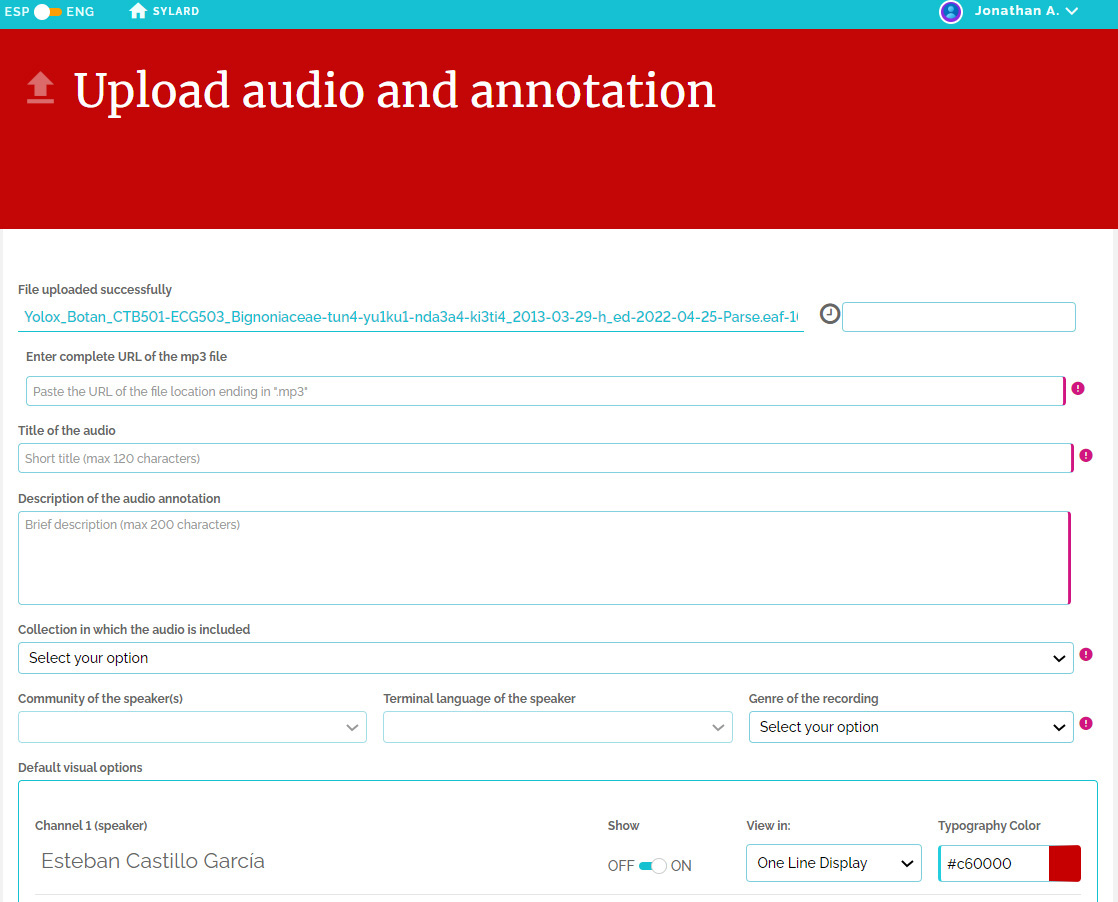
Paso 3:Un segundo grupo de metadatos incluye lo siguiente (fig. 40)
- Colección en la cual se incluye el audio;
- Comunidad de los hablantes;
- Lengua terminal de los hablantes;
- Género temático de la grabación.
El Contribuyente primero selecciona la Colección donde se incluirá el audio. Muchos Contribuyentes suben una sola colección. Para casos donde un Contribuyente tenga múltiples colecciones el menú desplegable mostrará todas las colecciones que el Contribuyente haya creado. Los Contribuyentes pueden agregar audio en cualquier momento a cualquier colección, una funcionalidad particularmente relevante ya que los Contribuyentes pueden generar nuevas audioanotaciones para cualquier colección.
Una vez seleccionada la “Colección en la cual se incluye el audio”, dos campos de metadatos —Comunidades, Lenguas— que se registraron al crear la colección, se representarán en un menú desplegable. Como se ve en lafigura 42, el menú desplegable muestra las mismas cuatro comunidades originalmente incluidas (fig. 34). El Contribuyente puede hacer clic en la comunidad que corresponde al audio cargado. Asimismo, las Lenguas Terminales también se representarán en una lista desplegable cuando hay más de una, aunque las colecciones generalmente sólo tienen una lengua terminal.
Los metadatos finales se toman de un vocabulario controlado de los temas de las grabaciones. Las opciones, que aún están en una lista preliminar, son visibles en el menú desplegable en la sección central a la derecha de lafigura 41. Para el archivo acerca deGodmania aesculifolia, se seleccionó el género Ethnobotany/Etnobotánica. En la próxima versión de SYLARD estos metadatos de género temático incluirán un espacio donde al usuario podría sugerir nuevos temas clasificatorios. Esta segunda versión de SYLARD también permitirá a los usuarios crear un filtro por temas concretos en varias colecciones a la vez, creando un corpus multilingüe temático.
El texto de este manual continúa debajo de lafigura 42.

Paso 4:: Creación de la visualización por defecto de las anotaciones
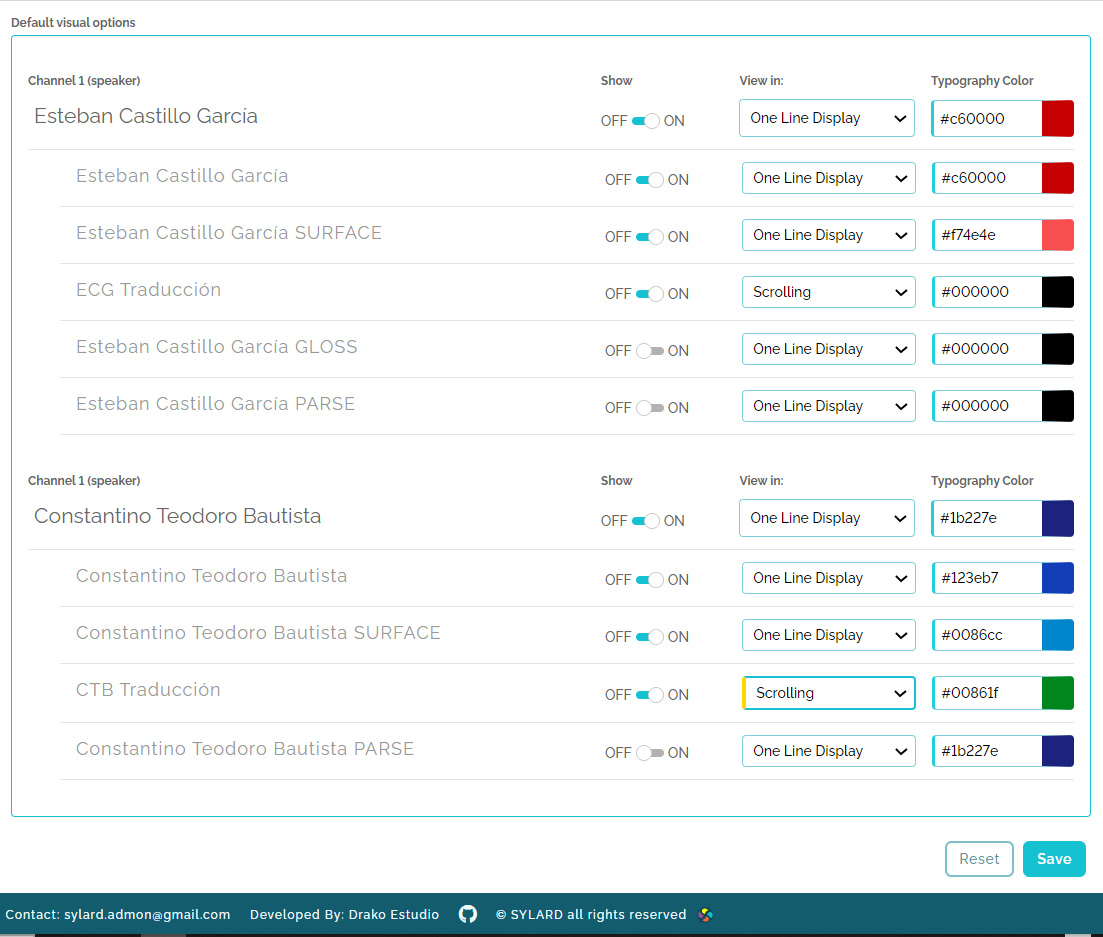
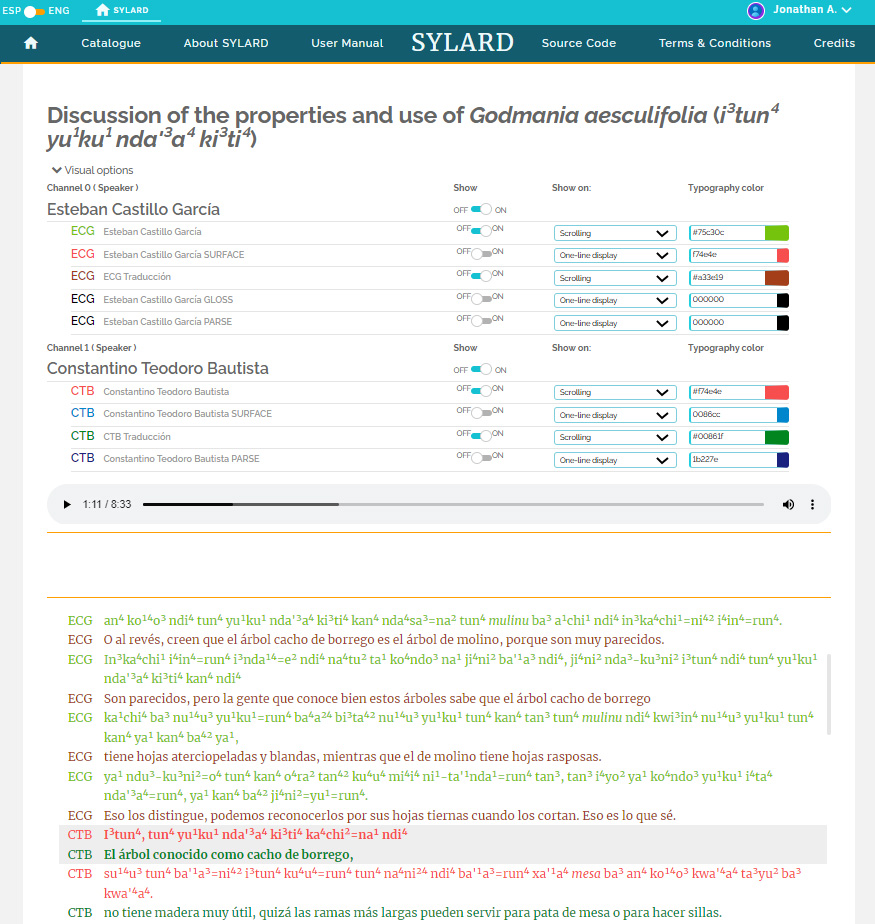
El último paso para cargar una audioanotación es seleccionar un formato para (1) la ubicación de cada tipo de anotaciones (línea por línea o en un cuadro donde las anotaciones se van resaltando mientras progrese el audio) y (2) los colores de las fuentes. La plantilla (figs.41y42) se crea durante la carga del archivo ELAN original: el software de SYLARD lee el archivo ELAN y extrae los nombres de los narradores y los textos de las anotaciones (fig. 41: Sección sobre Opciones visuales por defecto). Se debe tener en cuenta lo siguiente:
- Narradores:La primera línea de cada grupo (en una fuente tipográfica más grande) corresponde al nombre del narrador. En el presente caso, los hablantes son Esteban Castillo García y Constantino Teodoro Bautista. Este control permite al Contribuyente ocultar de la visualización por defecto cualquier anotación de cualquier narrador. También permitirá a los usuarios ocultar a cualquier hablante utilizando la función Opciones de visualización (ver más abajo).
- Renglones:E. Castillo tiene cinco renglones de anotaciones (fig. 41) mientras que C. Teodoro tiene cuatro (no visibles enfig. 41). El Contribuyente puede seleccionar si desea mostrar u ocultar de manera individual cada renglón en la vista predeterminada, la vista que ven los usuarios cuando acceden a la reproducción por SYLARD. Observe que cualquier usuario (ya sea Visitante o Contribuyente) puede activar las Opciones Visuales (fig. 46) y cambiar, para su visualización, qué renglones se muestran o se ocultan, independientemente de si el renglón estaba oculto o se mostraba en la presentación por defecto. El control de las Opciones visuales activadas por el usuario se tratará más adelante en referencia a lafigura 46.
- Visualización:La plantilla de visualización en SYLARD consta de dos secciones:
- Visualización en una línea
- Desplazamiento en un cuadro
- Color de fuente: Por último, el Contribuyente puede seleccionar el color del texto de la anotación de cada renglón. Hay dos maneras de seleccionar el color de fuente. La primera es introducir el valor hexadecimal del color, en el rectángulo junto al cuadrado de color, el cual cambia de color a medida que se modifican los valores hexadecimales. La segunda forma de seleccionar el color es a través de un selector de color (verfig. 44) que tiene opciones más limitadas. Pero su ventaja es la facilidad de asegurar una consistencia de color de fuente en anotaciones de audio diferentes cargadas por Contribuyentes en momentos diferentes.
Paso 5:Publicación
Una vez introducidos todos los metadatos y las selecciones para la visualización por defecto, el Contribuyente deberá hacer clic en Guardar (parte inferior derecha de las figs.43o44). Esto conserva los metadatos utilizados para la vista de reproducción (fig. 45)
Etapa 7:Configuración de la presentación visual para los usarios
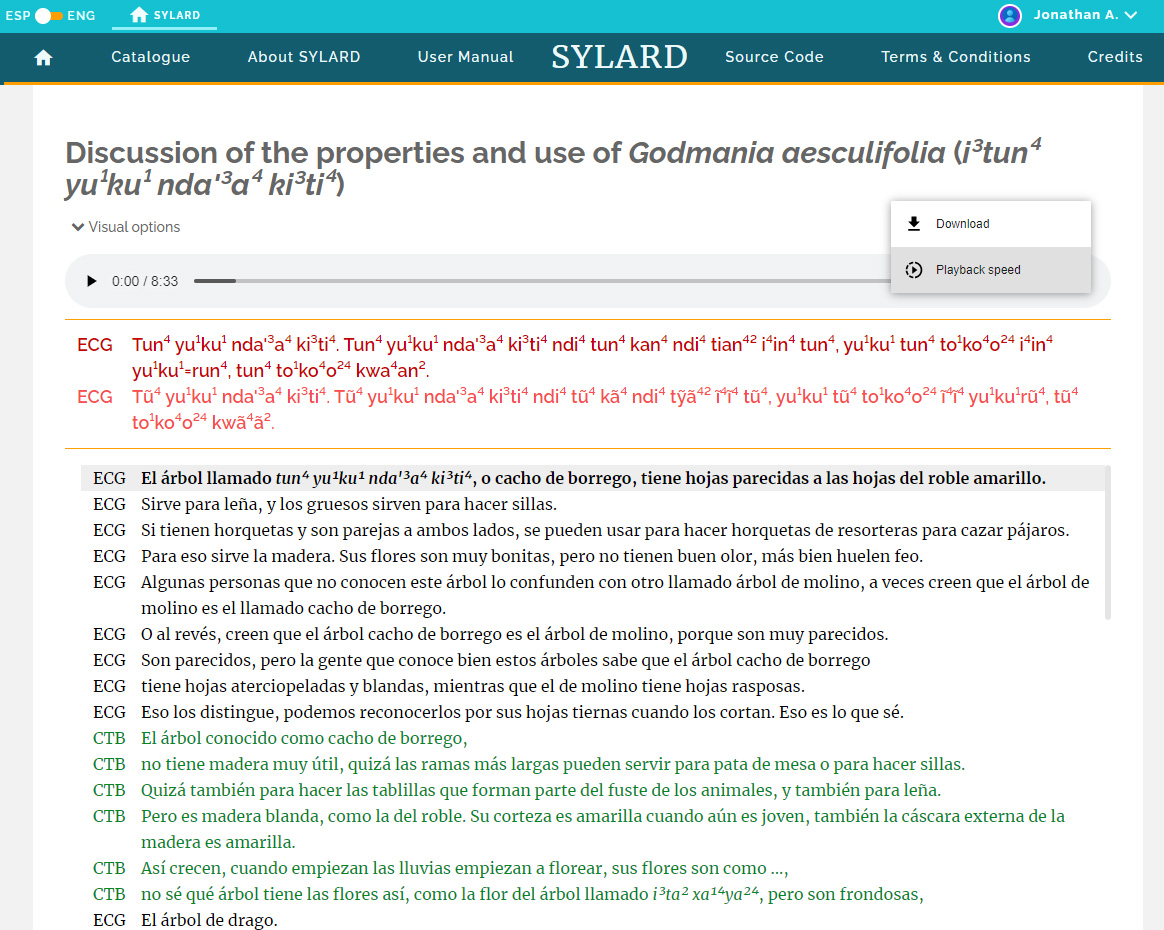
Esta última etapa presenta la experiencia del usuario en la visualización y reproducción de audio anotado/comentado (transcrito, traducido y anotado) a través de SYLARD. Cualquier usuario registrado (Visitante o Contribuyente) puede acceder al catálogo de SYLARD, seleccionar una colección y el audio que desea escuchar, e ir a la página de reproducción (fig. 45). La apariencia inicial del módulo de reproducción línea por línea, está determinada por la forma en que el Contribuyente creó los metadatos y el formato de visualización que se analizó en la Etapa 6: Cargando audio anotado a una colección.
Tras acceder al audio anotado, el usuario va a una página donde se puede reproducir el sonido haciendo clic en el triángulo a la izquierda de la barra de reproducción. Haciendo clic sobre los tres puntos verticales, a la derecha de la barra, le permite al usuario controlar la velocidad de reproducción y descargar el mp3. Una mejora a futuro permitirá descargar archivos de anotación ELAN y HTML.
Opciones de visualización
SYLARD también permite a los usuarios configurar la visualización de las audioanotaciones desplegando la función Opciones de visualización abajo del título. Al cargar un archivo ELAN un Contribuyente establece la vista de reproducción por defecto. En este caso (fig. 45) son dos representaciones ortográficas (práctica y superficial) en las anotaciones representadas en la sección línea por línea. La traducción al español, por otro lado, aparece en el cuadro de desplazamiento situado debajo de la visualización línea por línea de los textos en mixteco. La línea resaltada de la traducción cambia conforme avanza el audio, y las transcripciones en mixteco cambian también, línea por línea a medida que avanza la grabación.
Las opciones visuales pueden ser personalizadas por cada usuario. Los cambios en la presentación visual de los archivos anotados son temporales y específicos para el usuario que los realiza. Una mejora a futuro de SYLARD consistirá en crear cuentas en las que los usuarios puedan almacenar las preferencias de presentación que hayan creado, archivo por archivo.
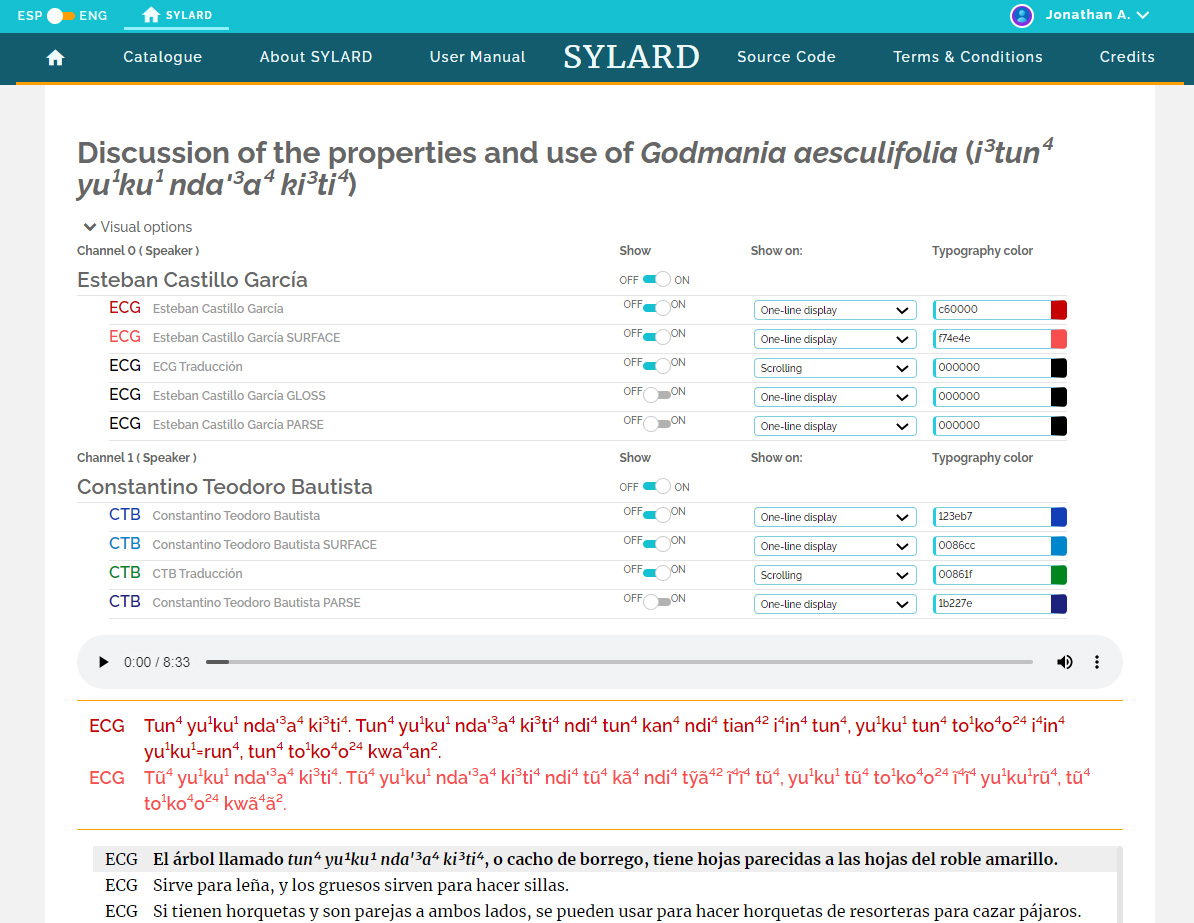
Los valores predeterminados para la reproducción se muestran automáticamente en la pantalla ampliada de Opciones Visuales (fig. 46). Observe que hay tres renglones que se han cargado pero están ocultos en la visualización: Esteban García Castillo GLOSS, Esteban García Castillo PARSE, y Constantino Teodoro Bautista PARSE. Por supuesto, el usuario puede ver fácilmente qué renglones han sido cargados pero no están visibles en la vista predeterminada, abriendo la pantalla Opciones Visuales (fig. 46) y observando los renglones apagados (Off) en la columna Mostrar. Los susodichos tres renglones estaban ocultos (cargados al servidor pero no presentados en la visualización por defecto) mientras que seis líneas de anotación (renglones) aparecen en la vista predeterminada por defecto (fig. 45, donde cuatro de estos renglones aparecen; no se muestran las ortografías prácticas y de superficie de Constantino Teodoro Bautista, el cual aparecerá en la vista de línea por línea una vez que la grabación llegue a su texto). Con la función de Opciones Visuales, un usuario que desee ver una de estas líneas de texto puede deslizar el interruptor al modo activado (On) y a continuación seleccionar donde desea que se muestre el renglón recién activado (puede ser una visualización en línea por línea o en el cuadro de desplazamiento) y el color de fuente del mismo renglón.
Lafigura 47ilustra el impacto inmediatamente visible de las vistas personalizadas por el usuario. En esta imagen el usuario ha abierto el menú de Opciones Visuales y ha cambiado la visualización:
- La ortografía superficial está ahora oculta (tanto para Esteban Castillo García como para Constantino Teodoro Bautista);
- La trascripción con ortografía práctica para ambos hablantes se presenta ahora en el cuadro de desplazamiento;
- La traducción de ambos hablantes es ahora representada en el Cuadro, inmediatamente debajo de la transcripción en mixteco;
- El usuario ha cambiado el color de fuente (comparefig. 45yfig. 47)
Los cambios se reflejan inmediatamente en la visualización de las anotaciones: Observe que la anotación en mixteco y la traducción en español se intercalan una antes de la otra en el cuadro de desplazamiento, con nuevos colores de fuente.
Por ejemplo, muchos usuarios podrían preferir que la ortografía práctica y la transcripción se vean una inmediatamente arriba de la otra para asociarlas fácilmente. Esto significaría que ambas se deben mostrar en el cuadro de desplazamiento y que los colores deberán seleccionarse para optimizar el contraste. El usuario que reconfiguró la visualización en el panel de Opciones Visuales para lafigura 47deseaba este efecto; el cambio ha sido implementado inmediatamente pero sólo para este usuario en particular. Para los demás usuarios la vista predeterminada por defecto sigue siendo la vista inicial al acceder a esta anotación de audio. Como ya se indicó, un desarrollo a futuro será cuentas de usuario individuales en las que se podrán almacenar las opciones visuales personalizadas que cada usuario desee, de manera que al volver a abrir el archivo en una fecha posterior a la configuración almacenada, la pantalla reconfigurada aparezca como la “predeterminada”.
Resumen
SYLARD ha sido creado para facilitar la difusión pública (a los nativos hablantes y comunidades, al público en general, a los investigadores) de grabaciones de audio en lenguas indígenas con anotaciones delimitadas con códigos de tiempos en lenguas indígenas. Frecuentemente estas grabaciones de audio y anotaciones (p. ej., transcripciones y traducciones, junto con otros análisis lingüísticos tales como el análisis sintáctico y la segmentación con glosas) no se difunden entre aquellos que podrían ser los más interesados. Aunque en este presente caso SYLARD es parte del portal Mesolex, es un software de código abierto y puede implementarse en cualquier lugar.


